Showing posts with label OTHER ARTIST. Show all posts

Monday, March 26, 2012

EASTER PARADE

©SassynSimple Tutorials

EASTER PARADE
Date Written: March 26, 2012
PROGRAMS YOU NEED
You are responsible for finding things you need to do this tutorial.
You will need a good working knowledge of the programs I use.
Paintshop or Corel Program 

ITEMS YOU NEED
 Thank all Of you whose items I used to make this tag.
I do appreciate the use of them.
TUBE: Of your Choice I used artwork by Disenos Canela HERE
KIT: Laurie Made Me Scraps Easter Parade HERE
FONT: Of your choice 

READ BELOW BEFORE STARTING
Settings may differ slightly depending on program you use I use x2
Close original after you copy it unless I state otherwise.
RE-SIZE only one layer and sharpen once if needed
Left click and right click refers to mouse buttons.
Refer to my image for placement of items. 

Now Lets Start
1.  Select your Tube minimize it for now.
Open a new 650x550 transparent image
We will resize later

2. Select element 64 Doodle from the kit edit/copy
Edit/paste as new layer into your image
Re-size 85%
Do not apply drop shadow yet
Move to bottom right side of image

3. Layers palette/right click doodle layer duplicate it 1 time
Image/mirror
Layers palette/right click/merge/merge down
Right click merged doodle layer duplicate it 1 time
Image/flip
Layers palette/right click/merge/merge down
Do not apply drop shadow

4.  Select frame 14  from the kit edit/copy
Edit/paste as new layer into your image
Re-size 75%
Move it to the top of image some refer to my image 

5. Effect/3D/Drop Shadow
(see settings below)
Click OK

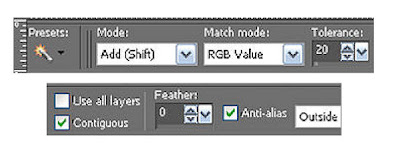
6.  Select magic wand (settings below)
Click inside the frame
Selections/modify expand 12 
Keep selected

7.  Layers palette/right click doodle layer/add a new raster layer
Select paper 18 from the kit edit/copy
Edit/paste into selection on your image
Selections/select none 

8.  Select your tube edit/copy
Edit/paste as new layer into image
Re-size as needed. I re-sized 90%
Apply same drop shadow
Arrange in frame like you want it  

9.  Layers palette/right click tube duplicate it 1 time
Right click duplicate/arrange bring to top
Use your eraser any parts you do not want hiding the frame 

10. Select element 37 flower from the kit edit/copy
Edit/paste as new layer into your image
Re-size 75%
Apply same drop shadow
Move to  right side of frame and move up some

11.  Layers palette/right click flower/duplicate it 1 time
Image/mirror

12. Select element 39 flower from the kit edit/copy
Edit/paste as new layer into your image
Do not Re-size
Apply same drop shadow
Move to the left side of frame next to other flower slightly below it

13. Layers palette/right click flower/duplicate it 1 time
Image/mirror

14.  Select element 60 butterfly from the kit edit/copy
Edit/paste as new layer into your image
Re-size 70%
Apply same drop shadow
Move to right side of frame 

15. Select element 1 easter basket  from the kit edit/copy
Edit/paste as new layer into your image
Re-size 65%
Apply same drop shadow
Move to bottom left side of the frame

17. Select element 6 duck from the kit edit/copy
Edit/paste as new layer into your image
Re-size 45%
Apply same drop shadow
Move to bottom  next to the basket

18. Select element 19 chick from the kit edit/copy
Edit/paste as new layer into your image
Re-size 45%
Apply same drop shadow
Image/mirror
Place right behind the duck

19. Select element 21 chick from the kit edit/copy
Edit/paste as new layer into your image
Re-size 45%
Apply same drop shadow
Image/mirror
Place right behind the other chick
20. At this time add any text that you wish to 

21. Re-size your image now if you want to I re-sized mine 550 in width 
height will adjust

22. Add a New Layer apply copyrights and watermark

23. Save your image in png format

BACKGROUND 


1. Open a new 1600x300 transparent image
Or width of your choice
Selections/select all
Select paper 27 from the kit edit/copy
Edit/paste into selection on your image
Selections/select none

2. Effects/Image Effects/Seamless tiling default settings

3. Select Element 29 border from the kit edit/cop
 Edit/paste as new layer into your image 
re-size it 80%
Image/free rotate 90.00 left boxes not checked
Move to the left border making sure to center it
so both ends look the same
Apply same drop shadow


4. Effects/Image Effects/Seamless tiling
(settings below)


5. Save your image by going to file/export/jpeg optimizer
compression value 30

Thanks for trying my tutorial I hope you enjoyed it. 

I want to thank Marsha and Ruth for testing my tutorials

Please apply a credit in your footer of any stationary you make using my tutorials.
With a link back to where my tutorial is located.

BLOG
http://sassynsimple.blogspot.com/

MY GROUPS
Some stationary I create is exclusive for these groups
http://groups.yahoo.com/group/sassynsimple/
http://groups.yahoo.com/group/ourpsphideaway/


©SassynSimple Tutorials

Monday, November 28, 2011

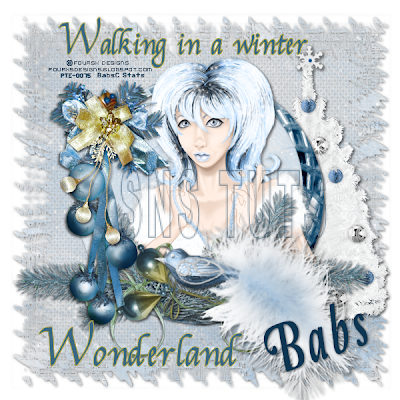
WINTER WONDERLAND

©SassynSimple Tutorials
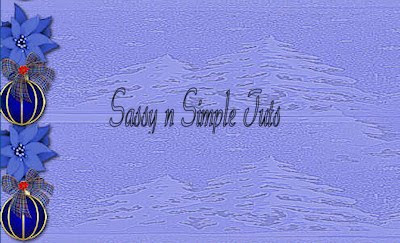
By Babs C
Name: WINTER WONDERLAND
Written: NOV 28, 2011


PROGRAMS YOU WILL NEED
You are responsible for providing the items needed to do my tutorials.
You need a good working knowledge of the programs I use.
Paintshop or Corel Program

ITEMS YOU WILL NEED
TUBE: Of your Choice, I used the artwork of Fourxs Designs PTU you must buy it at PTE I have a license for it
KIT: Nanly Designs FTU Blue Christmas Here
MASK: of Your choice I used my mask BBD_2011 Mask 83 Here
FONT: Of your choice

THINGS YOU NEED TO KNOW AND DO
Settings may differ slightly depending on Program and Kit used
Close original after you copy it unless I state otherwise.
RE-SIZE only one layer and sharpen once if needed
Left click and right click refers to mouse buttons.
Refer to my image for placement of items.


HEADER

1. Open your tube and mask Minimize them for now.

2. Open a new transparent Image 600x600
Selections/select all
Select Paper 03 from the Kit
Re-size it all layers 25%
Edit/copy Edit/paste into selection on your image
Selections/select none
Minimize paper we will use it 2 more times

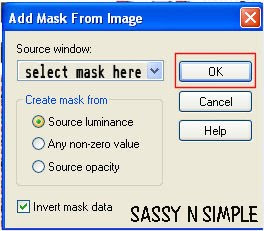
3. Layers/new mask layer/from image
Select BBD_2011_Mask 83 in window
(settings below)
Click Ok
Layers palette/right click/merge/merge group
Now re-size mask 105%


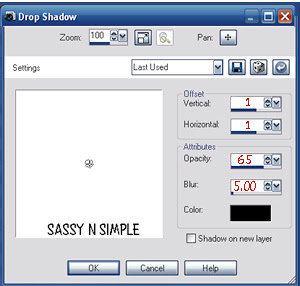
4. Effects/3D/Drop shadow
(settings below)
Click ok
5. Select Element 30 (tree) Edit/copy
Edit/paste as new layer into image
Re-size it 20% one layer
Adjust/sharpness/sharpen
Apply same drop shadow
Move to the right side of image do not go off mask

6. Select Element 04 (frame) from the kit
Edit/copy, edit/paste as new layer into image
Re-size it 30%
Adjust/sharpness/sharpen
Apply same drop shadow
Leave centered in image

7. Select magic wand (settings below)
Click inside the frame window
Selections/modify/expand 11
Keep selected


8. Layers palette/right click raster 1(tree)/add new raster layer
Bring up paper 03 Edit/copy
Edit/paste into selection on your image
Selections/select none
Minimize paper again

9. Select your tube Edit/copy
Edit/paste as new layer into your image above frame
Re-size as needed I re-sized mine 75%
Apply same drop shadow
Center it in frame If to much overlaps the frames bottom erase it

10. Select Element 38 (pine branch) edit/copy
Edit/paste as new layer into image
Re-size it 20% then re-size it again 85%
Adjust/sharpness/sharpen
Apply same drop shadow
Move to right bottom side of the frame

11. Layers palette/right click/duplicate branch 1 time
Image mirror

12. Open Element 23 (baubles) edit/copy
Edit/paste as new layer into image
Re-size it 15% then again 85%
Adjust/sharpness/sharpen

13. Image/free rotate 115 right
Apply drop shadow
Place at bottom slightly to left of the center

14. Select Element 20 (ball cluster) Edit/copy
Edit/paste as new layer into image
Re-size 20% Adjust/sharpness/sharpen
Image/mirror
Apply same drop shadow
Move to the left side of frame

15. Select element 37 from the kit Edit/copy
Edit/paste as new layer into your image
Re-size 15% Adjust/sharpness/sharpen
Apply same drop shadow
Move on top of blue balls

16. Select Element 29 (ball cluster) Edit/copy
Edit/paste as new layer into image
Re-size 20% re-size again 90 %
Image/free rotate 20.00 right
Adjust/sharpness/sharpen
Apply same drop shadow
Move to the bottom of frame slightly to the right of center

17. Apply your text at this time

18. Add a new raster layer apply copyrights and watermarks

19. Layers/palette right click any layer/merge/merge visible
Save your image in png format


BACKGROUND


1. Open a new transparent image 1600x300
Selections/select all
Pull up paper 3 Edit undo re-size
Using your selection tool (settings below)
Draw a rectangle we only want the blue of the paper
Avoiding the white edges
Edit/copy Edit/paste into selection on your image
Selections/select none
2. Effects /image effects/seamless tiling
default settings

3. Select Element 20 (ball cluster) edit copy
Edit/paste as new layer into your image
Re-size 15%
Adjust/sharpness/sharpen
Apply same drop shadow
Move to left border centering it

4. Select Element 37 edit/copy
Edit/paste as new layer into image
Re-size 15% then re-size 85%
Adjust/sharpness/sharpen
Apply same drop shadow
Move on top of blue balls

5. Layers/palette right click/merge/merge visible

6. Now lets save our image go to File/export/jpeg optimizer value set at 30

7. Save your image now
File/export/jpeg optimizer value 30

Thanks for Trying my Tutorial I hope you Enjoyed it.


I want to thank Marsha and Ruth for testing my tutorials.

If You use my tutorials Please include a credit and Link back to
My groups in your footer
http://groups.yahoo.com/group/sassynsimple/
http://groups.yahoo.com/group/ourpsphideaway/

My Tutorial Site is
http://sassynsimple.blogspot.com/
I also have some exclusive stationary Tutorials that I only share in My Groups
HERE or HERE

©SassynSimple Tutorials
Saturday, November 7, 2009

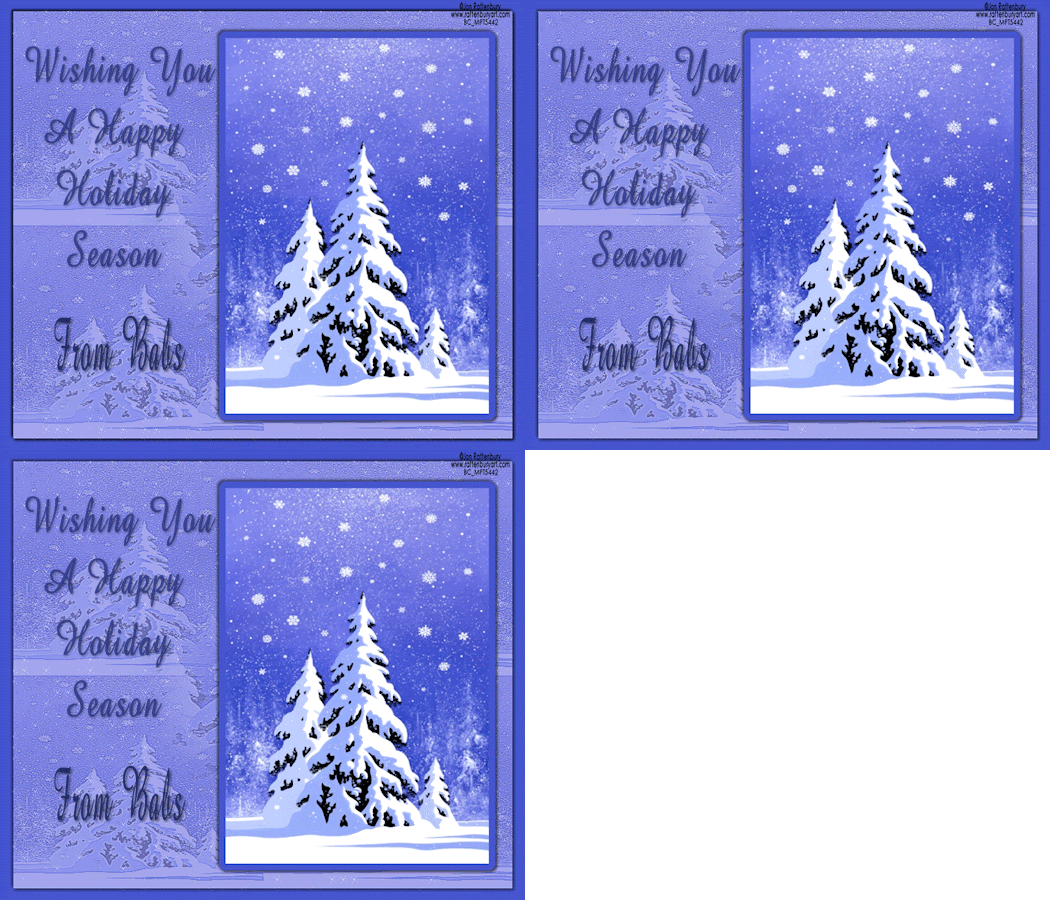
WISHING YOU ALL TUTORIAL 60


©SassynSimple Tutorials
DATE WRITTEN: Nov 7, 2009

THINGS NEEDED
Jasc Paintshop Pro or Corel Paint Program
You must have a good working knowledge of the programs I use.
Graphic: Jon Rattenbury is a PTU i got it at MyPSPTubes License MPT5442
PLUGINS: VM Natural/stardust
MY SUPPLIES: HERE

Let's Begin
The below steps must be done and will not be repeated.
We will use same drop shadow unless I state otherwise.
Always Close original image after you copy unless stated otherwise.
Always sharpen re-sized items one time.

1. Select and open your Tube
Using your dropper tool select your colors from image
left click/color/foreground a light color
right click/background color select a dark color
right click on your mouse

2. Open a new transparent image 700X600
Flood fill with your dark/background color

3. Layers palette/right click add a new raster Layer
Selections/Select all
Click on your Tube now Edit/copy
Edit/paste into selection
Selections select none

4. Effects/Plugins/Itatlian Picture In Picture Miscela 186

5. Effects/Edge Effects/Enhance more

6. Layers palette/right click add a new raster layer
flood fill it with your foreground color
layers palette take opacity down to 78
Now Right click on your filled layer Merge/merge down

7. Edit/copy
Edit/paste as new image
minimize this Image for now we will use it in our background

8. Back to your Original Image (merged)
Re-size this to 95%

layers palette right click rename this layer stardust

9. Still on merged Layer Effects/3D/drop shadow
Vertical and horizontal 2
Opacity 70
Blur 5.00
color black
Shadow on new layer not checked
Now Repeat drop shadow,Vertical/Horizontal to -2

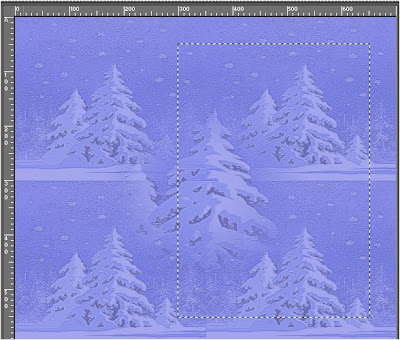
10. Select your selections tool
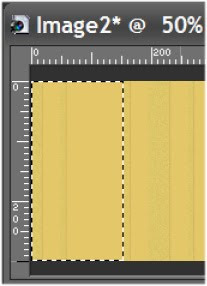
Start at 300 top ruller ruler mark draw out to 600 top ruler mark
Down to 550 Side ruler
(See Image below)

11. Layers palette/right click add a New Raster Layer
Edit/paste the selection from your image into selection into your image
Keep Selected

12. Selections/modify/Expand 9
Layers palette/right click add a new raster layer below the selection image
Right click to flood fill with your dark/background color
Selections/select none

13. Still on Dark Color selection Layer
Effects/3D/drop shadow
Vertical and horizontal -2
Opacity 70
Blur 5.00
color black
Shadow on new layer not checked
Now Repeat drop shadow. change Vertical/Horizontal to 2

14. Using Dropper Tool Select a really dark color from your image
left click/foreground color
right click/background color

15. Select your Text Tool
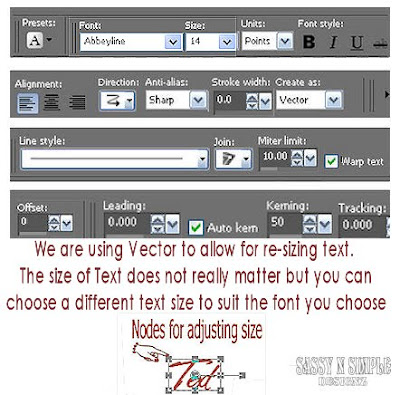
(settings below)
Type out “Wishing you
Layers palette/right click convert to raster layer once you size it
repeat this for all the other words
Apply drop shadow


16. Layers palette/right click add a new raster layers
Add your watermark and Copyrights
Click the eye in the layers palette to close off bottom two layers
right click any open layer/merge/merge visible
Re-size your image so that your height is 450 width will adjust.


ANIMATION
Open your Animation Shop now. I will refer to it as A.S.

1. Layers palette/right click stardust layer/Duplicate it 2 times
Click back on original Stardust bottom layer
Under Selections Tab Selections/select all
Selections/float
Selections/defloat
You must keep it selected

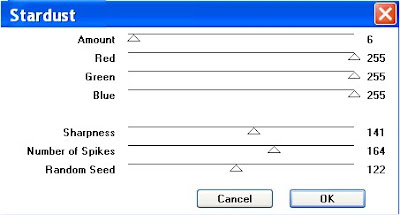
2, Effects/Plugins/VM Natural Stardust
apply the setting below
Do not close this Layer
proceed to next step 3, Select the middle stardust layer
Apply the VM Natural Stardust change random seed to 132
Layers palette click the eye close this layer

4. Select the Top stardust layer
Apply the VM Natural Stardust change random seed to 142
Layers palette click the eye close this layer

5. Edit/Copy Merged
Take it to AS
right click anywhere in the workspace/ paste as new image

6. Back in PSP Click the eye to close the bottom star dust Layer
Open your middle Stardust layer Edit/copy merged
Take it to AS right click on first frame/ Paste/Paste after current frame

7. Back in PSP click the eye to close off the middle stardust layer
Open the top stardust Layer Edit/copy merged
Take it to AS right click on second frame. Paste/Paste after current frame

8. Now save your animation in a folder so that you know where it is.

BACKGROUND

1. Open new transparent image. 1280x300.
or your desired width
Selection select all.
Open the Image I had you save Edit/copy
Edit/Paste into selection. Selections Select none

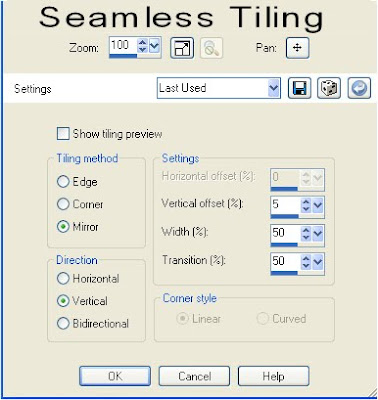
2. Effects/Image Effects/Seamless Tiling
(see settings below) 3. Select the BFD_CJ_Flower5 from my supplies, Edit/copy
Edit/paste as new layer into your image
Re-size it 25%
Adjust Hue/Saturation/colorize Hue 162 Saturation 143
Now apply your drop shadow
move it to the top left border of your image
Layers palette/right click/ Duplicate 1 time
move duplicate down leaving a space between them

4. Select the BFD_CJ_Ball10 from the supplies, Edit/copy,
Edit/paste as new layer into your image.
Re-size it 15%
Apply your drop shadow
Move it to the left border in between the flowers.
Layers palette/right click Duplicate 1 time
move the duplicate down to the bottom of your image
but spaced a little above the bottom.

5. Select the BFD_CJ_Bow from the supplies, Edit/copy,
Edit/paste as new layer into your image.
Re-size it 15%
Apply your drop shadow.
Move it to the left border over your first ball.
Layers palette/right click Duplicate 1 time and
move duplicate down over the other ball.
Save your Image File/Export/Jpeg Optimizer Value set at 30


If You use my tutorials in Stationary Please apply Credit Below

Tutorial by Babs C
HERE or HERE

You can copy and paste the above if that does not work use Links below
http://groups.yahoo.com/group/sassynsimple/
http://snsstats.blogspot.com/

My newer Stationary Tutorials are in Incredimail Letter form
in order to access them you must be a member of my group
Our PSP HideAway

©SassynSimple Tutorials
Sunday, November 1, 2009

WELCOME TO THE GROUP TUTORIAL 59


©SassynSimple Tutorials
DATE WRITTEN: Nov 1, 2009

THINGS NEEDED
Jasc Paintshop Pro or Corel Paint Program Settings may vary slightly.
You must have a good working knowledge of the programs I use.
TUBE: Creddy World under flower greetings Page 4 last tube FTU HERE
MASK: WeescotsLass WSL_MASK251 HERE
PLUGINS: Filter Factory H Alias Blur, Filters Unlimited Paper Textures
MY SUPPLIES: HERE
If you choose a different kit re-sizing may change.

Let's Begin
The below steps must be done and will not be repeated.
We will use same drop shadow unless I state otherwise.
Always Close original image after you copy unless stated otherwise.
Always sharpen re-sized items one time.


1. Open your Tube Using your dropper tool, left click/Foreground color light color, Right click background color dark color. Minimize tube for now.

2. Flood fill your image with your background color. Selections/Select all (keep selected

3. Bring up your Tube,
Edit/copy, Edit/paste into selection.
Selections Select none.
Effects/Image Effects/Seamless Tiling Default settings.
Adjust/Blur/Gaussian Blur 25.00

4. Effects/plugins/Filter Factory H/ Alias Blur X and Y both set on 28. Effects/Edge Effects/Enhance.

4. Add a New Raster Layer Flood Fill with your Light/foreground color Layers New Mask Layer/from Image Select the mask
in the window. source luminance/checked Invert mask data/unchecked.

5. Still on the Mask layer In your layers palette do the following
Right click black/white mask layer Delete/click yes. When the next pop up window comes up select Yes Right click mask layer Merge/merge group.


6. Still on your mask Layer Effects/Plugins/Filters Unlimited/Paper Textures/Canvas Fine Intensity set on 156 Lightness 87
Effects/3D/drop shadow
Vertical and horizontal 2
Opacity 70
Blur 5.00
color black
Shadow on new layer not checked

7. Bring up your Tube Edit/copy, Edit/paste as new layer into your image.
Re-size your tube. I re-sized mine 85%. Move it to the bottom Left corner. Apply Same Drop shadow.


8. Using your dropper tool Left click/foreground, Right click/background choose a dark color from your image.

9. Select your text tool (settings below) a fat font works best I used Lakeshore Drive NF. Type out WELCOME size it with your nodes. Then Right click in the text layer in your layers palette convert to raster layer.

10. Still on text layer Toolbar under selections tab do all of the following..
A. select all,
B. select float.
C. Select defloat.
D modify expand 2

Now add new Raster Layer under your Text Layer. Use your dropper tool to Pick a dark color left click/foreground color. Now flood fill the selection with your color. Selections/select none.

11. Effects/Plugins/Filters Unlimited/Paper Textures/Canvas Fine Intensity set on 156 Lightness 87

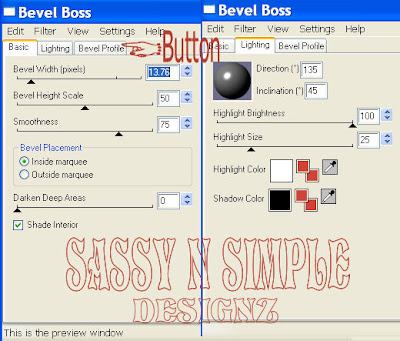
12. Still on your Text Layer Effects/Plugins/Eye Candy 4000 Bevel Boss settings below. Apply same drop shadow.

13. Repeat Steps 9 through 11 for the words To The and then the word Group.

14. Select your dropper tool once again left click/foreground color and choose the light color you used for mask. Keep background color the same.

15. Image Add border 3 Select it with your magic wand (settings below) Flood fill with your foreground color. Selections/select none.

16. Effects/Plugins/Filters Unlimited/Paper Textures/Canvas Fine Intensity set on 156 Lightness 87

17. Apply your drop shadow, Change Vertical and Horizontal to 1. Apply drop shadow again but change the Vertical and horizontal to -1 Selections/select none.

18. Image/add border 15. Select with magic wand. Flood fill with your dark/background color. Apply steps 15 and 16. (drop shadow will be reversed)

19. Repeat Steps 14 through 16.

20. Add your water mark and copyrights. Right click any layer and merge visible. Re-size your image so that the height is 420.

Save your image as a jpeg in a folder where you can find it.


BACKGROUND.

1. Open new transparent image. 1280x300. Flood fill your image with your background color. Selections/Select all (keep selected

2. Bring up your Tube,
Edit/copy, Edit/paste into selection.
Selections Select none.
Effects/Image Effects/Seamless Tiling Default settings.
Adjust/Blur/Gaussian Blur 25.00

3. Effects/plugins/Filter Factory H/ Alias Blur X and Y both set on 28. Effects/Edge Effects/Enhance more.

4. Add a new Raster Layer Flood fill with your light/foreground color take Opacity down to 40. In your layers palette right click merge/merge visible.

5. Effects/Image Effects/seamless tiling settings below.

6. Open the Border in my supplies. Select the border Layer, Edit/copy, Edit/paste as new layer into your image. Move it to the Left border of your image. Click on it with your magic wand. Flood Fill with your foreground color/light

7. Effects/Plugins/Filters Unlimited/Paper Textures/Canvas Fine Intensity set on 156 Lightness 87

8. Open the Border in my supplies. Select the Lace Trim Layer, Edit/copy, Edit/paste as new layer into your image. Move it to the Left border of your image. Click on it with your magic wand. Flood Fill with your background color/dark color. Repeat Step 7. Apply drop shadow. Make sure Vertical and Horizontal are on 2

9. Right click the Lace Trim layer in your layers palette merge/merge down.

10 Re-size the merged border layer 101%. Click on your mover tool with your Keyboard right arrow move the border back out till you see the other dark border. Now Merge Visible.

Save your Image in the folder you made, by going to File/Export/Jpeg Optimizer Value set at 30


If You use my tutorials in Stationary Please apply Credit Below

Tutorial by Babs C
HERE or HERE

You can copy and paste the above if that does not work use Links below
http://groups.yahoo.com/group/sassynsimple/
http://snsstats.blogspot.com/

My newer Stationary Tutorials are in Incredimail Letter form
in order to access them you must be a member of my group
Our PSP HideAway

I want to Thank Simply Classy n Sassy Group Testers for testing the Tutorial
I hope you enjoyed this tutorial
©SassynSimple Tutorials

Sunday, October 25, 2009

SEASONS GREETINGS TUTORIAL 56

©SassynSimple Tutorials


DATE WRITTEN: Oct 24, 2009

THINGS NEEDED
Jasc Paintshop Pro or Corel Paint Program Settings may vary slightly.
You must have a good working knowledge of the programs I use.
TUBE: Silvia’s Posers FTU PU Cookie 42 found under posertuben/cookie HERE
KIT: Team Kissed Christmas Elegance Full Size PTU you can buy it HERE
FONT: Annabel Antique Script FTU found under calligraphy HERE

If you choose a different kit re-sizing may change.

Let's Begin
The below steps must be done and will not be repeated.
We will use same drop shadow unless I state otherwise.
Always Close original image after you copy unless stated otherwise.
Always sharpen re-sized items one time.

Open your tube minimize for now

1. Open a new transparent image 700X600
Selections/select all
Select Paper 1 from the kit Edit/copy
Edit/paste into selection. Selections/select none

2. Add a new raster Layer Selections/select all
Select Paper 2 from the kit Edit/copy
Edit/paste into selection. Selections/select none
Re-size 90%. All layers unchecked, smart size

3. Still on the same layer Effects/3D/drop shadow
Vertical and horizontal 1
Opacity 70
Blur 5.00
color black
Shadow on new layer not checked
Now go back and apply drop shadow again change the vertical and horizontal to -1

4. Select wreath 2 from the kit, Edit/copy
Edit/paste as new layer into your image
Re-size the Wreath 20%
Apply same Drop shadow change the vertical and horizontal back to 1
Place towards the right side of your image. Refer to my image

5. Select your magic wand tool
(settings below)
Click inside the wreath
Selections/modify/expand 8. Keep Selected

6. Add a new raster layer under our wreath
Select Paper 3 from the kit. Edit/copy
Edit/paste into selection
Selections/select none

7. Select your Tube I am using Cookie42
Re-size your tube as needed
I re-sized my Tube 35%
Apply same drop shadow
move to the left border of your Image
Refer to my image

8. Select Bell 3 from the kit, Edit/copy
Edit/paste as new layer into your image
Re-size the bell 10%
Apply same drop shadow
move to the right bottom corner of your image

9. Select Christmas Tree 3 from the kit, Edit/copy
Edit/paste as new layer into your image
Re-size it 10%
Apply same drop shadow
Place on the left side of your wreath

10. Select Gold WordArt 2 from the kit, Edit/copy
Edit/paste as new layer into your image
Re-size it 20%
Apply same drop shadow
Place at the top of your image centered

11. With your dropper tool
left click/foreground color
right click background color
choose a dark color from your image
I used the maroon color from my background

12. Select your Text tool Select your Font
I used Annabel Antique Script
(Text settings below)
Type our “From” using your nodes size it like you want
Layers palette/right click convert to raster layer
Apply same drop shadow. Do the same for your Name

13. Now apply your watermark and copyrights
layers palette right click any layer merge/merge visible
Re-size your image, all layers, smart size height 400 width will adjust

14 Save your image


BACKGROUND

1. Open new transparent image. 1280x300.
Selection select all.
Select paper striped paper 1 from the kit Edit/Copy
edit/paste into selection
Selections/ Select none

2. Layers palette/right click add a New Raster Layer
Select your selections tool
selection mode is Rectangle
Mode is add (shift)
Make your ruler viewable by clicking view click on ruler
Now starting at the top 150 line draw your rectangle
(see image below)
Keep selected

3. Select Stripe Paper 1 from the kit. Edit/copy
edit/paste into selection
Selections/select none
Right click on the layer merge/merge visible

4. Effects/Image Effects/Seamless tiling
(settings below)

5. Select Velvet Tie 2 from the kit
Re-size it so that width is 305 Edit/copy
Edit/paste as new layer into your image
Free rotate it 90 right
Apply same drop shadow
Move it to the left just over your striped border
Make sure to center it

6. Select Seal 2 from the kit Edit/copy
Edit/paste as new layer into your image
Re-size it 15%
Apply same drop shadow
Move it over on to your border at the bottom centered


7. Select Ball 1 from the kit, Edit/copy
Edit/paste as new layer into your image
Re-size it 10%. re-size it again at 70%
Apply same drop shadow
move it over onto your border just above the seal. Refer to my image

8. Select Ball 2 from the kit, Edit/copy
Edit/paste as new layer into your image
Re-size it 10%. re-size it again at 70%
Apply same drop shadow
move it over onto your border above ball 1 towards the right some


9. Select Poinsettia 2 from the kit, Edit/copy
Edit/paste as new layer into your image
Re-size it 15%
Apply same drop shadow
Move it to your border towards the top


10. Right click any layer in the layers palette merge/merge visible

Save your Image File/Export/Jpeg Optimizer Value set at 30

Thanks for trying my tutorial I hope you enjoyed it

If You use my tutorials in Stationary Please apply Credit Below

Tutorial by Babs C
HERE or HERE

You can copy and paste the above if that does not work use Links below
http://groups.yahoo.com/group/sassynsimple/
http://snsstats.blogspot.com/

My newer Stationary Tutorials are in Incredimail Letter form
in order to access them you must be a member of my group
Our PSP HideAway

©SassynSimple Tutorials

Thursday, October 15, 2009

A QUICK NOTE TUTORIAL 54


DATE WRITTEN: Oct 15, 2009

THINGS NEEDED
PAINTSHOP PRO X2 OR SIMILAR PROGRAM. My tutorials can be adapted to other versions some settings may vary slightly.
You must have a good working knowledge of the programs I use.
TUBE: P.Ann’s Posers FTU HERE (some download others right click to save)
KIT: Monica Simply Sensational TS FTU Antique Beauty HERE
PLUGINS: Xero Radiance

If you choose a different kit re-sizing may change.

Let's Begin
The Following steps must be done but I will not repeat them each time.
We will use same drop shadow unless I state otherwise.
Always Close original image after you copy unless stated otherwise.
Always sharpen re-sized items one time.

Open your tube minimize for now.

1. Open a new transparent image 700X600 Selections/select all. Select Paper 13 from the kit edit/copy Edit/paste into selection. Selections/select none

2. Layers/new raster layer, Selections/select all. Select Paper 20 from the kit edit/copy Edit/paste into selection. Selections/select none Re-size this layer 95%. Effects/3D/drop shadow
Vertical and horizontal 2
Opacity 70
Blur 5.00
color black
Shadow on new layer not checked
Apply drop shadow again but change Vertical and horizontal to -2

3. Select Frame Element 5 from the Kit Edit/copy, Edit/paste as new layer into your image. Do not re-size. Apply Drop shadow change vertical and horizontal back to 2.

4. With your magic wand (settings below) click inside the frame window. Selections/modify Expand 8. Keep selection selected.

5. Add a New Raster layer under frame Layer. Select Paper 13 from the kit
edit/copy Edit/paste into selection. Selections/select none

6. Select your Tube Edit/copy, Edit/paste as new layer into your image below your frame. Re-size if needed, I re-sized my tube 50%. Arrange inside your frame window. Apply same drop shadow.

7. Close off the two bottom layers in your layers palette right click on any layer merge/merge visible. Open all layers back up.

8. Select Lillies2 from the kit Edit/copy, Edit/paste as new layer into your image. Arrange it on the Right side of your frame. Do not re-size. Duplicate it one time. Image/mirror the duplicate copy.

9. Select bow wrap4 from the kit Edit/copy, Edit/paste as new layer into your image. Re-size it 75%. Image/mirror Move it to the bottom of your frame. Apply same drop shadow.

10. Select the Journal 2 from the kit Edit/copy, Edit/paste as new layer into your image. Re-size it 70% Move it to the right bottom corner of your image. Apply same drop shadow.

11. Select your dropper tool Left Click/foreground color, right click/background color. Choose the same dark color from your image for both.

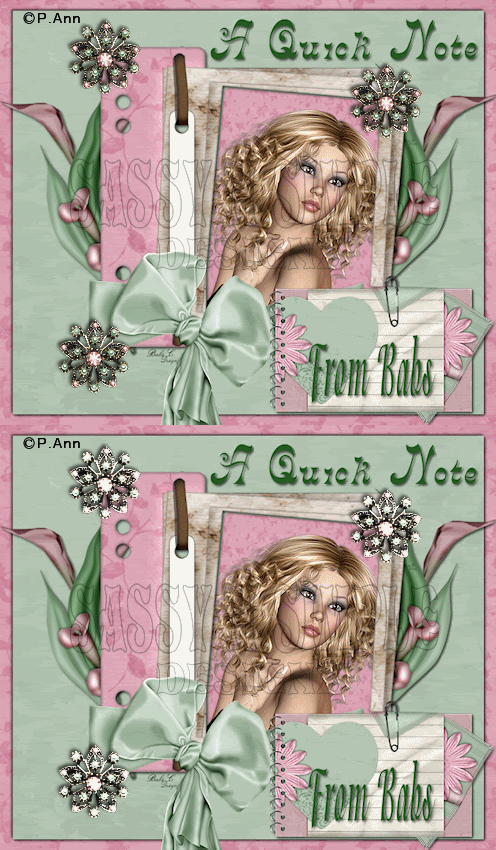
12. Select your text tool. Settings below. Type out “A Quick Note“, size with your nodes Placing it on the Top Right corner . Then Type out From and Your Name size it with the notes place this on your journal. Apply Same drop shadow to both. Fonts I used Aridi08 and Isadora Lt Regular. Apply Same drop Shadow

13. Apply your watermark and copyrights. In layers palette right click merge/merge visible. Re-size image so that your height is 425 width will adjust.

14. Select broach2 from the kit Edit/copy, Edit/paste as new layer into your image. Re-size it 30%. Apply Same Drop shadow. Place on the top right corner of the frame. Duplicate it 2 times and arrange them on the left corners of the frame.

15.Close your bottom merged Layer. In layers palette right click any broach layer merge/merge visible. At this point you should have two merged layers

ANIMATION

1. Duplicate your merged broach layer 1 Time.

2. Click on your Top Broach layer (copy of merged) Effects/Plugins/Xero Radiance apply settings below. Close of this layer by clicking the eye in layers palette.

3. Click on Bottom Broach Layer Apply the Xero Radiance again settings below.

4. Edit/copy Merged Paste into Animation Shop as new animation by right clicking anywhere in the window.

5. Close the Bottom Broach Layer Open your Top Broach Layer Edit/copy merged. Back in Animation Shop right click the first frame Paste/paste after current frame.

6. Save your image.


BACKGROUND.

1. Open new transparent image. 1280x300. Select paper 20 from the kit In your foreground color select the paper under the patterns tab on your material palette. Flood fill your image
Angle 0
Scale 100

2, Effects/Image Effects Seamless Tiling settings below.


3. Open flower swirl1 Edit/copy, Edit/paste as new layer into your image. Re-size it 50%
Image/Free rotate 45 right
Uncheck the following boxes
Rotate all layers
Rotate single layer around canvas
Move to the left border of your image and apply same drop shadow.

4. Right click in your layers palette merge/merge visible.


Save your Image in the folder you made, by going to File/Export/Jpeg Optimizer Value set at 30

PLEASE PLACE CREDIT ON ALL STATS
Tutorial by Babs C
HERE or HERE

Just copy and paste into your Stationary
I want to Thank Simply Classy n Sassy Group Testers for testing the Tutorial
I hope you enjoyed this tutorial..

Thursday, September 24, 2009

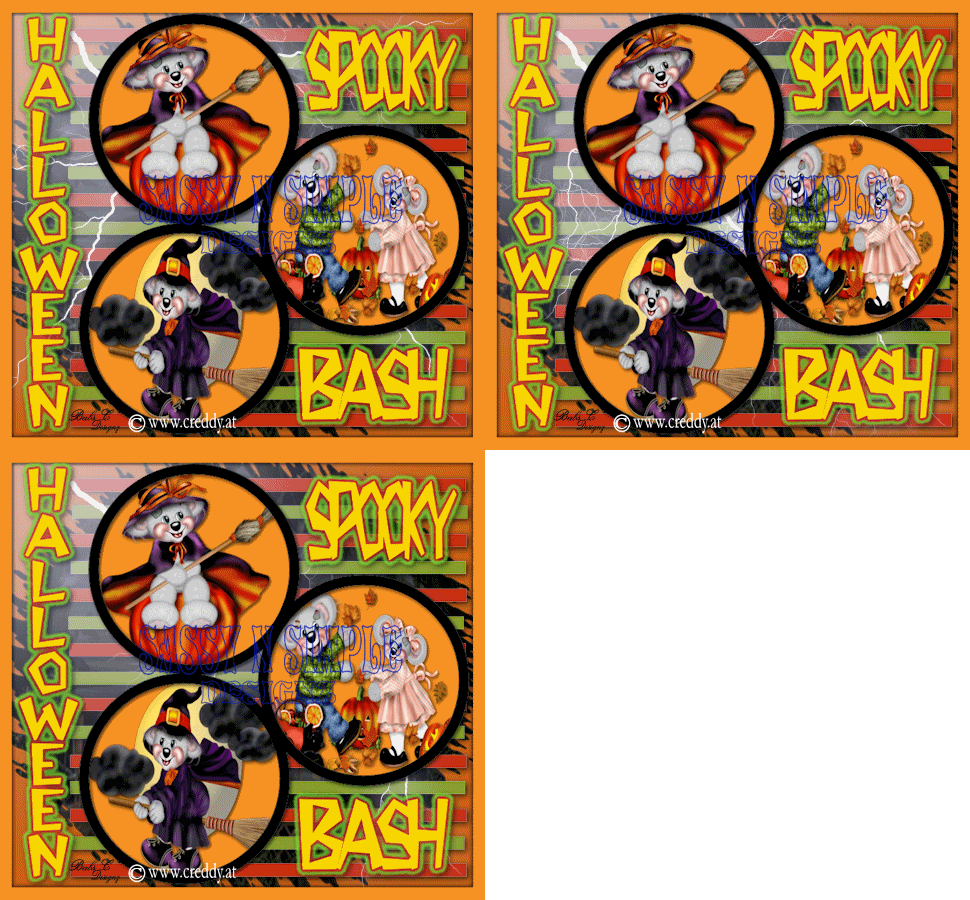
HALLOWEEN SPOOKY BASH TUTORIAL 48


DATE WRITTEN: Sept 24, 2009

THINGS NEEDED PAINTSHOP PRO X2 OR SIMILAR PROGRAM. My tutorials can be adapted to other versions some settings may vary slightly. You must have a good working knowledge of the programs I use.
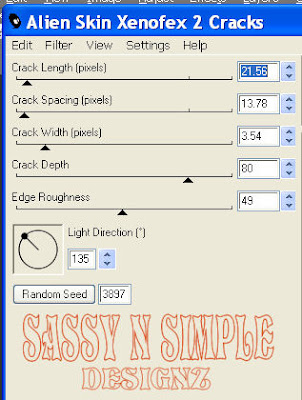
TUBE: 3 tubes needed I am using FTU Creddy found here www.creddy.at PLUGINS: Eye Candy 5 Impact, Xenoflex 2 Lighting and cracks
MY SUPPLIES
: HERE


Let's Begin
First Please note that I will not repeat the following steps.
Once you set your drop shadow it will stay..

Always Close original image after you copy unless stated otherwise.
Always sharpen re-sized items one time.


1. Select 3 tubes of your choice, minimize two of them. Ke
ep one open for choosing colors.

2. Select and Open BBD_Template12. Delete the top logo layer. Click on the Backing layer add a new raster above it then delete the backing layer.

3. On the new Raster lay
er you just added. With your dropper tool select a light to medium color from your tube in your foreground color. Flood fill your layer.

4. Click on the Lg Circle layer. With your magic wand settings below. click on the circle. Select a dark color from your tube Flood fill this selection. Selections/select none. Effects/3D/ drop shadow vertical and horizontal 2, Opacity 70 and blur 8.00

5. Select your Lines 1 layer Under your Selections Tab do these steps.. A. select all, B. select float.C. Select defloat. Now select another color from you tube and flood fill the selections. Selections/select none. Apply same drop shadow.

6. Select your Lines 2 layer. Under your Selections Tab do these steps.. A. select all, B. select float.C. Select defloat. Now select another color from your tube and flood fill the selections. Selections/select none. Apply same drop shadow. Now right click and merge /merge down this layer into Lines 1

7. Right Click on Circle 3 in the layer Merge/merge down. Now Right click on the Merged circle layer and merge it down into Circle 1 layer. At this point all your circles should be on one layer.

8. Add a new Raster Layer under your Circles layer. With your magic wand same settings as before. Click inside each window. S
elections/modify expand 3. Pick a color from your tube with your dropper tool in your foreground color and flood fill the selections. Selections/select none.

9. Add a new raster Layer above the layer you just filled. Now select your circles layer. Using your magic wand same settings as before. click inside one of the circles. Selections/modify expand 3. Now select one of your Tubes Copy and paste into selection on the new layer you added. Selections Select none.

10. Repeat step 9 but Skip add a new raster layer Use the same layer the other tube was place on. Doing one window and tube at a time till you have placed the other 2 tubes onto the layer. 2. Once you have placed all 3 tubes. Apply same drop shadow.

11. Select your merged circles layer. Under your Selections Tab do these steps.. A. select all, B. select float. C. Select defloat. D modify expand 1. Select a color from you tube in your foreground color and flood fill. Selections/select none. Apply same drop shadow.

12. Select the border Layer. Using your magic wand same settings as before click on the border. (you will not see the outside lines) Select a color from your tube in your foreground color and flood fill. Keep selected.

13. Still on the border layer Effects/3D/drop shadow. Same that you have been using. Now go back and apply the drop shadow again. This time change the vertical and horizontal to -2. Selections/select none.

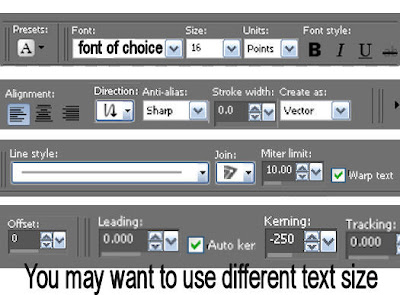
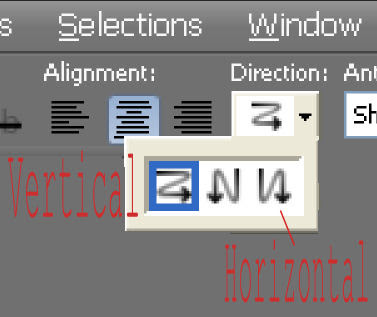
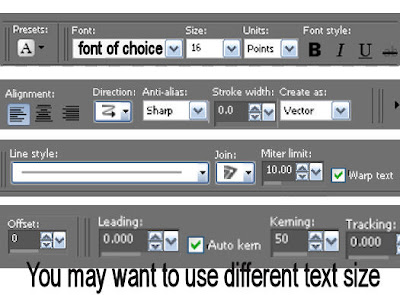
14. Now Select your text tool Settings below. Note: You have to change the direction see 2nd image. Type out Halloween. Since I always use vector you can adjust it to the height and width you like. Do not apply drop shadow.

15. Still using your text tool Change the direction back to vertical. look above. Type out your other two words separately so you can place them in the right place. Do not apply drop shadow.

16. Now Starting with your Top text merge it down by right clicking on the layer with your mouse. Do this until you have all 3 text layers merged together.

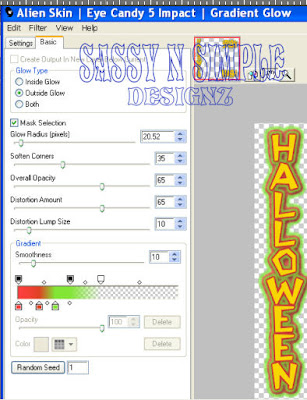
17. On your merged text layer go to Effects/Plugins/Eye Candy 5 impact/ Gradient Glow. See settings below. Now apply your same drop shadow making sure you change the vertical and horizontal back to 2.

18. Add your watermark and copyrights if any. Re-size all layers so that height is no more than 450 width will adjust.

ANIMATION

1. Still using your image. Right click on Lines 1(merged layers) duplicate it 2 times. Close off the top and middle layer. You close or open a layer by clicking on the eye in the layers palette.

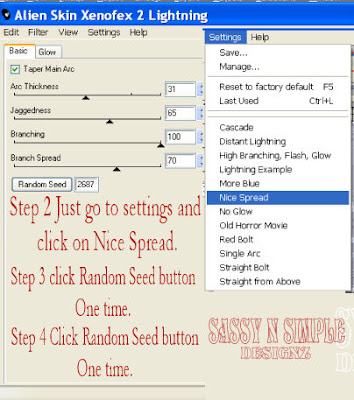
2. Click on Bottom Lines 1 layer. (original) Effects/Plugins/Xenoflex 2 lighting settings below do exactly as written. no other changes needed.
Leave this layer open.
3, Click on the middle layer of Lines (copy of lines 1) Apply the lighting again. Just click the Random Seed One time. Close this layer by clicking the eye in the layer palatte.

4. Click on the top layer of lines (copy 2 of lines 1) Again apply the lighting. Again click the random seed button one time.
Close off this layer.
5. Now Click on any layer besides your lines layer. Bottom Line layer should still be open. Copy merged. Now take it to your Animation Shop right click anywhere in the window and paste as new animation.

6. Back in your PsP program Close off the bottom (lines 1) layer. Open the middle lines layer (copy of lines 1). Copy merged Then take it to Animation shop again right click on the frame that is there select paste/after current frame.

7. . Close off the middle layer. Open the top (copy 2 lines 1) Layer. In PsP program Copy merged Then take it to Animation shop again right click the second frame, select paste/after current frame. I did not change the display time.


8. Save your animation.. I Always make a folder and name it to save my images in. (but do not close it.)


BACKGROUND.
1. Open new transparent image. 1280x300. With your dropper tool select a color from your image in your foreground color. Flood fill th
e image.2. Effects/Texture Effects/texture You can use your own or the one I supplied. But you must place it in your Programs texture folder.
1. Under Documents My Psp Files find the texture folder and drag it into it.
2. C/programs files/the name of your program and find the texture folder.
Settings
Size 50%, Smoothness 0,

Dept 1, Ambience 0,
Shininess 0 Angle 315, Intensity 50, Elevation 30. Color white

3. Making sure you have ruler set for viewing you do that under View. With you selection tool set on rectangle. Starting at the 150 ruler mark. Draw out a rectangle all the way to the left border and the entire length of the image.

4. Add a New Raster Layer with your dropper tool sele
ct a color from you image Flood fill the selection. Keep Selected.

5. Effects/Plugins/Xenoflex 2 Cracks. Settings below. Selections/Select none. Apply same drop shadow. Merge visible


6. Effects/Image Effects/Seamless tiling see settings below.

7. Select one of your Tubes copy and paste into your image Re-si
ze so that it fits on your cracked border. Apply same drop shadow.

8. Apply your Text settings below.


9. Apply your watermark if you wish too.
Save your Image in the folder you made, by going to File/Export/Jpeg Optimizer Value set at 30
PLEASE PLACE CREDIT ON ALL STATS
Tutorial by Babs C
HERE or HERE
Just copy and paste into your Stationary

I want to Thank Simply Classy n Sassy Group Testers for testing the
Tutorial
I hope you enjoyed this tutorial..