
DATE WRITTEN: Sept 24, 2009
THINGS NEEDED PAINTSHOP PRO X2 OR SIMILAR PROGRAM. My tutorials can be adapted to other versions some settings may vary slightly. You must have a good working knowledge of the programs I use.
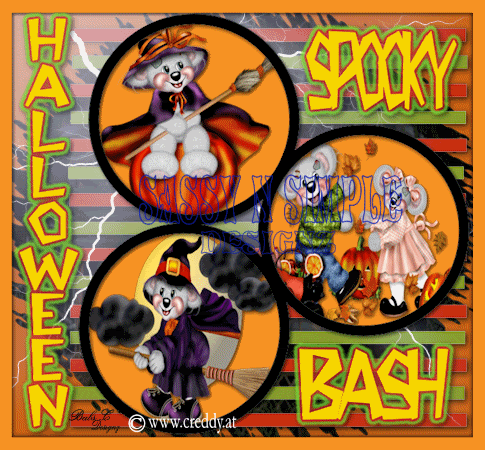
TUBE: 3 tubes needed I am using FTU Creddy found here www.creddy.at PLUGINS: Eye Candy 5 Impact, Xenoflex 2 Lighting and cracks
MY SUPPLIES: HERE
Let's Begin
First Please note that I will not repeat the following steps.
Once you set your drop shadow it will stay..
Always Close original image after you copy unless stated otherwise.
Always sharpen re-sized items one time.
1. Select 3 tubes of your choice, minimize two of them. Keep one open for choosing colors.
2. Select and Open BBD_Template12. Delete the top logo layer. Click on the Backing layer add a new raster above it then delete the backing layer.
3. On the new Raster layer you just added. With your dropper tool select a light to medium color from your tube in your foreground color. Flood fill your layer.
4. Click on the Lg Circle layer. With your magic wand settings below. click on the circle. Select a dark color from your tube Flood fill this selection. Selections/select none. Effects/3D/ drop shadow vertical and horizontal 2, Opacity 70 and blur 8.00

5. Select your Lines 1 layer Under your Selections Tab do these steps.. A. select all, B. select float.C. Select defloat. Now select another color from you tube and flood fill the selections. Selections/select none. Apply same drop shadow.
6. Select your Lines 2 layer. Under your Selections Tab do these steps.. A. select all, B. select float.C. Select defloat. Now select another color from your tube and flood fill the selections. Selections/select none. Apply same drop shadow. Now right click and merge /merge down this layer into Lines 1
7. Right Click on Circle 3 in the layer Merge/merge down. Now Right click on the Merged circle layer and merge it down into Circle 1 layer. At this point all your circles should be on one layer.
8. Add a new Raster Layer under your Circles layer. With your magic wand same settings as before. Click inside each window. Selections/modify expand 3. Pick a color from your tube with your dropper tool in your foreground color and flood fill the selections. Selections/select none.
9. Add a new raster Layer above the layer you just filled. Now select your circles layer. Using your magic wand same settings as before. click inside one of the circles. Selections/modify expand 3. Now select one of your Tubes Copy and paste into selection on the new layer you added. Selections Select none.
10. Repeat step 9 but Skip add a new raster layer Use the same layer the other tube was place on. Doing one window and tube at a time till you have placed the other 2 tubes onto the layer. 2. Once you have placed all 3 tubes. Apply same drop shadow.
11. Select your merged circles layer. Under your Selections Tab do these steps.. A. select all, B. select float. C. Select defloat. D modify expand 1. Select a color from you tube in your foreground color and flood fill. Selections/select none. Apply same drop shadow.
12. Select the border Layer. Using your magic wand same settings as before click on the border. (you will not see the outside lines) Select a color from your tube in your foreground color and flood fill. Keep selected.
13. Still on the border layer Effects/3D/drop shadow. Same that you have been using. Now go back and apply the drop shadow again. This time change the vertical and horizontal to -2. Selections/select none.
14. Now Select your text tool Settings below. Note: You have to change the direction see 2nd image. Type out Halloween. Since I always use vector you can adjust it to the height and width you like. Do not apply drop shadow.


15. Still using your text tool Change the direction back to vertical. look above. Type out your other two words separately so you can place them in the right place. Do not apply drop shadow.
16. Now Starting with your Top text merge it down by right clicking on the layer with your mouse. Do this until you have all 3 text layers merged together.
17. On your merged text layer go to Effects/Plugins/Eye Candy 5 impact/ Gradient Glow. See settings below. Now apply your same drop shadow making sure you change the vertical and horizontal back to 2.

18. Add your watermark and copyrights if any. Re-size all layers so that height is no more than 450 width will adjust.
ANIMATION
1. Still using your image. Right click on Lines 1(merged layers) duplicate it 2 times. Close off the top and middle layer. You close or open a layer by clicking on the eye in the layers palette.
2. Click on Bottom Lines 1 layer. (original) Effects/Plugins/Xenoflex 2 lighting settings below do exactly as written. no other changes needed. Leave this layer open.

3, Click on the middle layer of Lines (copy of lines 1) Apply the lighting again. Just click the Random Seed One time. Close this layer by clicking the eye in the layer palatte.
4. Click on the top layer of lines (copy 2 of lines 1) Again apply the lighting. Again click the random seed button one time. Close off this layer.
5. Now Click on any layer besides your lines layer. Bottom Line layer should still be open. Copy merged. Now take it to your Animation Shop right click anywhere in the window and paste as new animation.
6. Back in your PsP program Close off the bottom (lines 1) layer. Open the middle lines layer (copy of lines 1). Copy merged Then take it to Animation shop again right click on the frame that is there select paste/after current frame.
7. . Close off the middle layer. Open the top (copy 2 lines 1) Layer. In PsP program Copy merged Then take it to Animation shop again right click the second frame, select paste/after current frame. I did not change the display time.
8. Save your animation.. I Always make a folder and name it to save my images in. (but do not close it.)
BACKGROUND.
1. Open new transparent image. 1280x300. With your dropper tool select a color from your image in your foreground color. Flood fill the image.2. Effects/Texture Effects/texture You can use your own or the one I supplied. But you must place it in your Programs texture folder.
1. Under Documents My Psp Files find the texture folder and drag it into it.
2. C/programs files/the name of your program and find the texture folder. Settings
Size 50%, Smoothness 0,
Dept 1, Ambience 0, Shininess 0 Angle 315, Intensity 50, Elevation 30. Color white
3. Making sure you have ruler set for viewing you do that under View. With you selection tool set on rectangle. Starting at the 150 ruler mark. Draw out a rectangle all the way to the left border and the entire length of the image.
4. Add a New Raster Layer with your dropper tool select a color from you image Flood fill the selection. Keep Selected.
5. Effects/Plugins/Xenoflex 2 Cracks. Settings below. Selections/Select none. Apply same drop shadow. Merge visible

6. Effects/Image Effects/Seamless tiling see settings below.

7. Select one of your Tubes copy and paste into your image Re-size so that it fits on your cracked border. Apply same drop shadow.
8. Apply your Text settings below.

9. Apply your watermark if you wish too. Save your Image in the folder you made, by going to File/Export/Jpeg Optimizer Value set at 30