Showing posts with label OUTLAW. Show all posts

Wednesday, October 21, 2009

DRAMA QUEEN TUTORIAL 55


©SassynSimple Tutorials
DATE WRITTEN: Oct 21, 2009
THINGS NEEDED

Jasc Paintshop Pro or Corel Paint Program Settings may vary slightly.
You must have a good working knowledge of the programs I use.

You must have a good working knowledge of the programs I use.
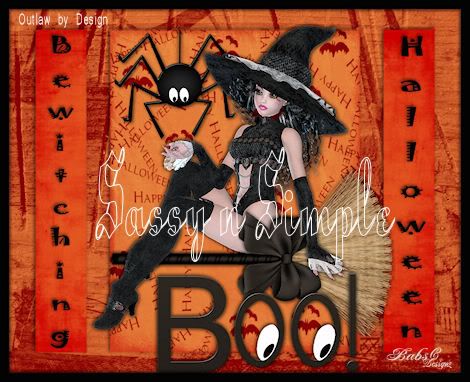
TUBE: Outlaw by Design is FTU Poser Page 2 HERE
KIT: Is By Bea’s Creations Drama Queen FTU tagger you can get it HERE
If you choose a different kit re-sizing may change.

Let's Begin

The below steps must be done and will not be repeated.
We will use same drop shadow unless I state otherwise.
Always Close original image after you copy unless stated otherwise.

Always sharpen re-sized items one time.Refer to my image if you need to for placement.

Open your tube minimize for now. A sitting tube will work better.

1. Open a new transparent image 700X600 Selections/sel
ect all. Select Paper 8 from the kit edit/copy, edit/paste into selection. Selections/select none

2. Add a New Raster Layer Selections/Select All Select Paper
10 from the kit, Edit/copy, Edit/Paste into Selection. Selections/Select None. Re-size 95%. Effects/3D/drop shadow Vertical and horizontal 2, Opacity 70, Blur 5.00, color black, Shadow on new layer not checked Now Apply the drop shadow again but Change the Vertical and Horizontal to -2. Minimize paper 10 for now you will need it again.

3. Select frame 02 from the kit Edit/copy, Edit/paste as new layer into your image. D0 Not Re-size. Move it towards the bottom of you image. Apply Drop Shadow. Make sure you change Vertical and Horizontal back to 2.4. Select your magic wand tool (settings below) Click inside the frame window. Selections/modify Expand 8. Keep selected.

5. Add a New raster Layer below your frame Layer. Select Paper 3 from the kit. Edit/copy, Edit/paste into Selection. Selections/sele
ct none.6. Select Ribbon 01 From the Kit, Edit/copy, Edit/paste as new layer into your image. Re-size it 95%. Apply Drop Shadow and move to the bottom of your image.

7. Select Butterfly 02 from the kit. Edit/copy, Edit/pas
te as new layer into your image. In your layers palette lower Opacity to 65..Re-size it 50%. Apply same drop shadow. Move it to the top right hand corner of your Image

8. Still on your Butterfly Layer duplicate it One time. Image/mirror.. Move this one back over to the right and below your original butterfly.


9. Select your tube Edit/copy, Edit/paste as new layer into your image. Re-size as needed If using the one I used Re-size it 25%. Apply same drop shadow. Arrange the tube so that it is sitting on your frame


10. Select ticket 01 from the kit Edit/copy, Edit/paste as new layer into your image. Do not re-size. Image/free rotate it 15.00 left. Apply same drop shadow. Move to the top Left corner centered in the open space.

11. Select Candy heart 02 from the kit Edit/copy, Edit/paste as new layer into your image. Image/Free Rotate it 15.00 right. Do not Re-size it. Apply same drop shadow. Move it to sit just above the left top corner of your ticket. Minimize the heart for now.


12. Select heart 02 from the kit Edit/copy, Edit/paste as new layer into your image. Image/Free Rotate it 15.00 right Do not re-size. Apply same drop shadow. Move this below your first heart. Minimize the heart for now.

13. Select Candy heart 01 from the kit Edit/copy, Edit/paste as new layer into your image. Image/Free Rotate it 15.00 right. Do not Re-size it. Apply same drop shadow. Move it to the bottom of your previous heart.
Minimize the heart for now.

14. Select flower 01 from the kit Edit/copy, Edit/paste as new layer into your image. Do not re-size Apply same drop shadow. Place it on the right side of your frame’s edge.


15. Still on your flower layer duplicate it One time. Image/mirror.
16. With your Dropper tool left click foreground for foreground color and right click for background color. Choose a dark color from your image.

17. Select your text tool (settings below) Type out your name. Using nodes size it to fit inside of your Frame window. Right click on the layer in layers palette convert to raster layer and apply same drop shadow.

18. Apply watermarks and copyrights Re-size image so that height is 400. Width will adjust.


Make a folder and save your image in it.
When you hit "save as" there I will be an options button click on it and set your compression factor to 4. This will take away the grainy look that you get sometimes.

BACKGROUND.


1. Open new transparent image. 1280x300. Selection select all. Select paper 10 from the kit. Edit/Copy, Edit/paste into selection. Sele
ctions/ Select none.2, Effects/Image Effects/seamless tiling see settings below.

3. Select flower 01 from the kit Edit/copy, Edit/paste as new layer into your image. Do not re-size, Apply same drop shadow. Move it to the left Border of your image.

4. Select Candy heart 01 from the Kit. Edit/copy, Edit/paste as new layer into your image. under your Flower Layer. Re-size it 80%. Image/free rotate 15.00 right. move it slightly under the top part of your flower.

5.
Select heart 02 from the Kit. Edit/copy, Edit/paste as new layer into your image. above your Flower Layer. Re-size it 80%. Image/free rotate 15.00 left. move it slightly over the center of your flower. .

6. Select Candy heart 02 from the Kit. Edit/copy, Edit/paste as new layer into your image. under your Flower Layer. Re-size it 80%. Image/free rotate 15.00 right. move it so that it is slightly under the bottom part of your flower. Save your Image in the folder you made, by going to File/Export/Jpeg Optimizer Value set at 30
PLEASE PLACE CREDIT ON ALL STATS
Tutorial by Babs C
HERE or HERE

Just copy and paste into your Stationary

Monday, August 24, 2009

TUT 39 BEWITCHING HALLOWEEN


DATE WRITTEN: Aug 24, 2009

THINGS NEEDED
PAINTSHOP PRO 9 OR SIMILAR PROGRAM.
TUBE: Outlaw by Design Poser HERE
MASK: By by Me.. included in my supplies
KIT: Bel Vidotti Scraps Spooky HERE
MY SUPPLIES: HERENot all kits are same sizes. Re-sizing may be different

Let's Begin

Once you set your drop shadow it will stay..
Always Close original image after you copy.
Always sharpen re-sized items one time.

1. Open you tube and the mask 5_by NB in my supplies minimize for now.

2. Open a new transparent image 800X650Selections/select all. Select Paper 28 from the kit copy and paste into selection. Selections/select none

3. Add a new raster Layer. Select black color in your foreground color Flood fill the layer.

4. Under Layers on your tool bar select new mask layer/from image.
Select the mask BDD_Mask 9 from my supplies in the window. Make sure source Luminance is checked and invert mask data is checked. Click Ok.

5. With your Right mouse button click on the white and black mask it has a mask icon on it. Select delete. Right click top mask merge/merge group. When it ask “Would you like this mask merged into the Layer below it” select yes. Re-size your mask layer 90%.

6, With your magic wand click on the inner large rectangle. Selections/modify expand 1. Select paper 05 from the kit, Copy and paste into selection. Selections select none. See wand settings below.

7. With your magic wand click on the two outer rectangles same wand settings as before. Selections/modify expand 1. Select paper 01 from the kit copy and paste into selection. Selections Select none. Now apply drop shadow Vertical and Horizontal set at 2, Opacity 65 and blur 8.00. Now Merge visible.

8. Select the Spider 4 from the Kit copy and paste into image as new layer. Re-size it 60% move it so that it is on the right corner of the large rectangle. Apply same drop shadow.

9. Select the spider string from my supplies. Copy and paste it as new layer under your spider layer. Take your Eraser and remove any string that is below your spider. Apply same drop shadow. You do not need to re-size.

10. Select your poser/tube copy and paste into image as new layer Re-size it 40%. Arrange so that her hat is at the top of your large rectangle. And her foot is slightly outside of the rectangle. Refer to my image. Apply Same drop shadow.

11. Select broom 20 from the kit copy and paste into your image as new layer under your tube layer. Under image on your tool bar select free rotate 90 Right. Make sure rotate all layers is not checked an rotate single layer around canvas is not checked. and arrange it so that your poser looks as if she is sitting on it. Do not re-size.

12. With your selection tool draw out a square that will copy part of the bow from the broom you do not want it to cover her arm. Make sure your broom layer is selected and Under Edit select copy. Add a new layer above your tube. Under edit paste into selection. Selections/select none. If this does not work with the version you are using manually drag it into place with your mouse.

13. Now you need to go back and apply your drop shadow to your broom..

14, Open the Boo element 11 copy and paste into your image as new layer. Re-size it 80%. Move it so that it is on the bottom right side of your large rectangle refer to my image.

15. Now Select a Font I used Jokerman. Text tool settings below. Type out your words separately size them to fit into your outer rectangles boxes. Once happy with size and placement. Right click on your text layers and convert them a raster layer.

16. Select the frame from my supplies Copy and paste it into you image as new layer. Apply your drop shadow..

17. Apply your watermark and copyrights. Merge visible all layers. Re-size your image so that width 470 height will adjust. Save your image.


BACKGROUND.

1. Open new transparent image. 1280x300. Selections/select all. Select paper 14 from the kit Copy and paste into selection. Selections/ Select none.

2, Select the Border from my supplies copy and paste into your image as new layer move it to the left edge of your image. Click on it with your magic wand same settings as before is fine. Selections/Modify/expand 1. Keep Selected

3. Select Paper 1 from the kit. Select it in your materials palette under pattern angle 0 scale 50. Flood fill the selection. Selections/select none.

4. Merge visible. Effects/image effects/seamless tiling see settings below.

5. Select witch 21 copy and paste into your image as new layer. Re-size it 30%. Move over onto the border on the left side. Apply drop shadow. Vertical and Horizontal set at 2, Opacity 65 and blur 8.00.

6. Select the same font you used in the header. Type out Happy Halloween. Type each word separately. Re-size it to fit into the border area and Angle to the left. Refer to my image.

7. Merge visible Save your Image by going to file/export/jpeg Optimizer value set at 30.

PLEASE PLACE CREDIT ON ALL STATS
Tutorial by Babs C
HERE or HERE

Just copy and paste into your Stationary
I want to Thank Simply Classy n Sassy Group Testers for testing the Tutorial
I hope you enjoyed this tutorial..

Friday, August 7, 2009

Tut 21 SNS BREAKING FREE


BACKGROUND IMAGE GOT LOST SORRY
Date Written: July 8. 2009
THINGS NEEDED
Paintshop Pro 9 or similar program. You need a good knowledge of the programs
TUBE: Posers by OutLaw you can get them HERE.
MASK: weescotslass Mask299 HERE
KIT: ZiggyFan Scraps Cinnamon Spice Tagger 600x600 FTU HERE Tagger kit.
Plugins Eye Candy 4000 and Xenoflex 2
Remember not all kits are the same so re-sizing may be different.
Let's Begin
Set your drop shadow. Once set it will Stay.. unless I state otherwise.
Vertical and Horizontal 1. Opacity 65 and Blur 5.00
Always Close original image after you copy.
Always Sharpen Items you re-size one Time..

1. Open your tubes minimize for now.

2. Open a New transparent image. 700x600 Select it in your foreground color under patterns in your material pallette flood fill with a paper from the kit I used 2.

3. New Raster layer Choose another paper from the kit I used 1. Select it in your foreground color under patterns in your material pallette and flood fill you layer

4. Open the mask. Layers/new mask Layer/from Image. Select your mask uncheck invert mask data if it is checked. And source luminance should be checked. Click Ok. Now right click on the black mask layer and delete it. When it ask do you want to merge into layer below select yes. Now right click top mask layer then merge/merge group.

5. Open The Frame 1 Copy and paste it into your image as new layer. It should be place so the bottom is near the 500 mark on your ruler.

6. Add a New raster layer under your frame. With your magic wand click inside the frames windows. The go Selection/modify expand 4. Keep it selected.

7. Open a paper from the kit. Select it in your foreground color under patterns on your material palette. Now Flood fill the selections on you new layer. Selection/select none.

8. Open your Tubes copy and paste into your image as a new layer you will want the top one behind your frame. If you use the same posers I resized my top one 35% and my bottom one 30% And you want to place yours like my you will need to use your freehand tool and copy the areas you want to bring to the front on the top tube.. Her hand will have to be redone to remove the extra around it. For the bottom I was able to just copy part of the frame.

9. Once you have your tubes set. Apply the following drop shadow Vertical and Horizontal 2, Opacity 65 and Blur set to 5.00. Apply it to both tubes and the frame. Not the selection part of the tube..

10. Now close your background layer and mask layer. merge visible. Re-size your merged Layer 90%. Move it to the top some but leave room for framing.

11. Open the flower up copy and paste into your image as a new layer. Re-size it 40%. Apply same drop shadow as before. Duplicate it pull one layer under your merged tube and frame layer.

12. Open the buttons Choose 2 of them. Using your freehand tool draw around the first one you want to use. Copy and paste it into image Selections/select none then select your second button the same way. Copy and paste into image. Apply your drop shadow same as before.. Then duplicate one two times. And one 1 time. Pulled two of them under my frame same as I did with my flower. Refer to my image if you need to.. No re-sizing needed..

13. Open the ribbon copy and paste it into your image as a new layer. Re-size it 50%. Apply you same drop shadow. I arranged on my left side of my frame. Close your back ground layer and mask layer and merge visible.

14. Now Select a paper in your foreground color. Close off your background color and with your rectangle tool set line width to 20 and draw out your frame around your image. I used 5. Scaled it 50 and angled it 45. Convert it to a raster Layer.

15.. Effects/Plugins/eye candy 4000 Bevel Boss. See settings below. Or you can use your PsP Bevel if you wish. I just perfer eye candy as it gives it a better look to me.
16. Now choose a color from your image for you text and type it out. Add a raster layer below it. Click on your text Layer. Selections/ Select all, float then defloat it. Selections modify expand 2. Now choose a color that will help your text stand out. And flood fill the selections in your new layer. Right click your text layer and merge it down into your flood filled layer. . Apply your same drop shadow as before.

17. Re-size your image so that the height is no more than 450. Width will adjust. Apply your copyrights and your watermark.

ANIMATION

1. Duplicate your mask Layer 2 times.

2. Select the bottom mask layer Effects/Plugins/Xenoflex 2/electrify see settings below..

3. Select your Middle Mask Layer apply the xenoflex2 again but this time change your random seed one time. Then select your top mask layer and again apply your xenoflex 2 again change the random seed one time.

4. Close off the top 2 mask layers. Highlight your background Layer. Edit/copy merged and paste into animation shop as new animation. Close off bottom mask layer Open the middle mask layer again copy merged paste into animation shop after current frame. Close off middle mask layer open top mask Layer. Copy merged and paste into animation shop after current layer.

Save your image..

Background:

1. Open a new transparent image 1000x300 Flood fill with a paper from the kit I used paper 2.

3. Open the ribbons Select two you like and with your selections too select a width of 300 Copy and paste it into your image and Free rotate it 90 Right. Apply Drop shadow. Vertical and Horizontal 2, Opacity 65 and Blur set to 5.00.

4. Merge visible and apply seamless back ground. See settings below.
5. Open the flower Copy and paste into image as a new layer and re-size it 25% Apply drop shadow same as before and duplicate arrange it to the left border.

6. Open the buttons Copy and paste into your image as new layer. Re-size 70% apply same drop shadow and duplicate one arrange them to the left border see my image for placement.

7, Now merge layers and save by going to file export jpeg optimizer at 25 value.


PLEASE PLACE CREDIT ON ALL STATS
Tutorial by Babs C
HERE or HERE

Just copy and paste into your Stationary
I want to Thank Simply Classy n Sassy Group Testers for testing the Tutorial
I hope you enjoyed this tutorial..