Monday, September 28, 2009

ALL STAR TUTORIAL 49


DATE WRITTEN: Sept 27, 2009

THINGS NEEDED
PAINTSHOP PRO X2 OR SIMILAR PROGRAM. My tutorials can be adapted to other versions some settings may vary slightly.
You must have a good working knowledge of the programs I use.
TUBE: Keith Garvey you must but it at MPT
MASK: WSL_MASK259 HERE (241-300 download)
KIT: Fantasy Moments Tagger Kit Surprise Me HERE
PLUGINS: Eye Candy 4000 Bevel Boss
Not all kits are same sizes. Re-sizing may be different if choose another kit.

Let's Begin
First Please note that I will not repeat the following steps.
Once you set your drop shadow it will stay..
Always Close original image after you copy unless stated otherwise.
Always sharpen re-sized items one time.

1. Open you tube a Close up will work best and the wsl_mask259 in my supplies minimize for now.

2. Open a new transparent image 700X650 Selections/select all. Select Paper 7 from the kit copy and paste into selection. Selections/select none

3. Add a New Raster Layer. Selections/Select all Select Paper 17 from the kit copy and paste into selection. Selections/select none Re-size 95%. Effects/3D/Drop Shadow Vertical and Horizontal set to 2, Opacity set to 60 and blur set to 5.00. Go Back and apply drop shadow again. But change Vertical and Horizontal to -2 (minimize this paper we will use it again.)

4. Add a New Raster layer Selections/Select all.. Select paper 7 from the kit go to Edit/copy, Edit/paste into selection. Selections/select none.

5. Under Layers on your tool bar select new mask layer/from image.
Select the mask in the window. Make sure source Luminance
is checked and invert mask data is not checked Click ok.

6. In your Layers palette with your mouse Right click on the white and black mask in your layers palette, Select delete. Right click top mask merge/merge group. When it ask “Would you like this mask merged into the Layer below it” select yes. Apply Drop Shadow. (remember to change The Vertical and Horizontal back to 2. Right click in your layers palette merge/merge visible.

7.Select Element 60 From the kit. Edit/copy, Edit/paste as new layer into your image Re-size it 80%. Apply drop shadow.

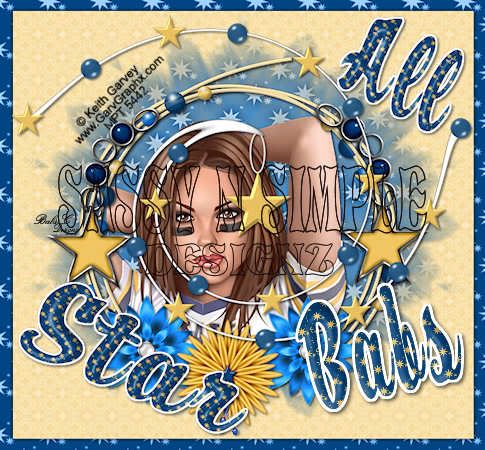
8. Select your Tube Edit/copy, Edit/paste as new layer into your image. Apply same drop shadow. Center it in your mask.

9. Select Element 23 from the kit. Edit/copy, Edit/paste as new layer into your image. Re-size it 40%. Apply Same Drop shadow. Duplicate it and place one towards the left bottom side of the circle element. Take the other one to the right bottom side of the frame.

10. Select Element 38 from the kit. Edit/copy, Edit/paste as new layer into your image. Re-size it 40%. Apply Same Drop shadow. Place it in the center on the bottom of circle element. Adjust the flowers if you need to.

11. Select Element 29 from the kit. Edit/copy, Edit/paste as new layer into your image. Re-size 70%.. Apply same drop shadow. Place on the left side of your frame. (refer to my image). Duplicate and mirror the duplicated copy.

12. Select Element 62 from the kit. Edit/copy, Edit/paste as new layer into your image. Arrange To your likening over the face of your tube. Do not re-size. Apply Same drop shadow.

13. Close off the merged background layer. Right click on any element layer in your layers palette. Merge/merge visible. Re-size merged 90%.

14. Select Paper 9 in your foreground and background colors under pattern. Angle 0 scale 30. Select a font of you choice. Use settings below Type out All. Using your nodes drag out your text the size you want Rotate it to the right slightly. I used CK Puppy Love Font. Right click in the layers palette convert to raster layer.

15. Effects/Plugins/Eye Candy 4000 Bevel Boss. See settings below.

16. Repeat Steps 14 and 15 for the word Star. Then Merge/merge down the top Text layer into the bottom text layer. Under your Selections Tab do these steps.. A. select all, B. select float. C. Select defloat. D modify expand 3. Keep Selected

17. Add a new raster layer under your merged text layer. Select White in your foreground color and flood fill. Selections/ Select none. Apply your drop shadow.

18. Apply your watermarks/copyrights. Re-size the image so that height is no more than 450. Width will adjust.

Make a folder To Save your image in. File Export, Jpeg Optimizer value set at 30.

BACKGROUND.

1. Open new transparent image. 1280x300. In your Material palette Select Paper 17 that you have minimized Under your patterns tab on your foreground color. Angle 0 and scale 100. Now flood fill your image. You can close out the paper now.

2. Select Element 35 Edit/copy, Edit/paste as new layer into your image. Re-size it 65%. Move it to the left border centered in you image. Apply same drop shadow.

3. Select Element 38 Edit/copy, Edit/paste as new layer into your image. Re-size it 50%. Apply same drop shadow. Move it to the left border centered over the first one. Apply same drop shadow.

4. Select Element 23 Edit/copy, Edit/paste as new layer into your image. Re-size it 10%. Apply same drop shadow. Move it to the left border centered over the prior element. Apply same drop shadow.

5. Select Element 41 Edit/copy, Edit/paste as new layer into your image. Re-size it 10%. Apply same drop shadow. Duplicate it 2 times. Take the original place it at the bottom of the outside elements Take one duplicate Mirror it Place it towards The top Take the second duplicate Image/free rotate 45. Left. make sure rotate all layers is not checked an rotate single layer around canvas is not checked. Place this one in the middle. Refer to my image for placement.

6. Merge visible. Effects/Image Effects/seamless tiling settings below.

Save your Image in the folder you made, by going to File/Export/Jpeg Optimizer Value set at 30

PLEASE PLACE CREDIT ON ALL STATS
Tutorial by Babs C
HERE or HERE

Just copy and paste into your Stationary
I want to Thank Simply Classy n Sassy Group Testers for testing the Tutorial
I hope you enjoyed this tutorial..

Thursday, September 24, 2009

HALLOWEEN SPOOKY BASH TUTORIAL 48


DATE WRITTEN: Sept 24, 2009

THINGS NEEDED PAINTSHOP PRO X2 OR SIMILAR PROGRAM. My tutorials can be adapted to other versions some settings may vary slightly. You must have a good working knowledge of the programs I use.

TUBE: 3 tubes needed I am using FTU Creddy found here www.creddy.at PLUGINS: Eye Candy 5 Impact, Xenoflex 2 Lighting and cracks
MY SUPPLIES
: HERE


Let's Begin
First Please note that I will not repeat the following steps.
Once you set your drop shadow it will stay..

Always Close original image after you copy unless stated otherwise.
Always sharpen re-sized items one time.


1. Select 3 tubes of your choice, minimize two of them. Ke
ep one open for choosing colors.

2. Select and Open BBD_Template12. Delete the top logo layer. Click on the Backing layer add a new raster above it then delete the backing layer.

3. On the new Raster lay
er you just added. With your dropper tool select a light to medium color from your tube in your foreground color. Flood fill your layer.

4. Click on the Lg Circle layer. With your magic wand settings below. click on the circle. Select a dark color from your tube Flood fill this selection. Selections/select none. Effects/3D/ drop shadow vertical and horizontal 2, Opacity 70 and blur 8.00

5. Select your Lines 1 layer Under your Selections Tab do these steps.. A. select all, B. select float.C. Select defloat. Now select another color from you tube and flood fill the selections. Selections/select none. Apply same drop shadow.

6. Select your Lines 2 layer. Under your Selections Tab do these steps.. A. select all, B. select float.C. Select defloat. Now select another color from your tube and flood fill the selections. Selections/select none. Apply same drop shadow. Now right click and merge /merge down this layer into Lines 1

7. Right Click on Circle 3 in the layer Merge/merge down. Now Right click on the Merged circle layer and merge it down into Circle 1 layer. At this point all your circles should be on one layer.

8. Add a new Raster Layer under your Circles layer. With your magic wand same settings as before. Click inside each window. S
elections/modify expand 3. Pick a color from your tube with your dropper tool in your foreground color and flood fill the selections. Selections/select none.

9. Add a new raster Layer above the layer you just filled. Now select your circles layer. Using your magic wand same settings as before. click inside one of the circles. Selections/modify expand 3. Now select one of your Tubes Copy and paste into selection on the new layer you added. Selections Select none.

10. Repeat step 9 but Skip add a new raster layer Use the same layer the other tube was place on. Doing one window and tube at a time till you have placed the other 2 tubes onto the layer. 2. Once you have placed all 3 tubes. Apply same drop shadow.

11. Select your merged circles layer. Under your Selections Tab do these steps.. A. select all, B. select float. C. Select defloat. D modify expand 1. Select a color from you tube in your foreground color and flood fill. Selections/select none. Apply same drop shadow.

12. Select the border Layer. Using your magic wand same settings as before click on the border. (you will not see the outside lines) Select a color from your tube in your foreground color and flood fill. Keep selected.

13. Still on the border layer Effects/3D/drop shadow. Same that you have been using. Now go back and apply the drop shadow again. This time change the vertical and horizontal to -2. Selections/select none.

14. Now Select your text tool Settings below. Note: You have to change the direction see 2nd image. Type out Halloween. Since I always use vector you can adjust it to the height and width you like. Do not apply drop shadow.

15. Still using your text tool Change the direction back to vertical. look above. Type out your other two words separately so you can place them in the right place. Do not apply drop shadow.

16. Now Starting with your Top text merge it down by right clicking on the layer with your mouse. Do this until you have all 3 text layers merged together.

17. On your merged text layer go to Effects/Plugins/Eye Candy 5 impact/ Gradient Glow. See settings below. Now apply your same drop shadow making sure you change the vertical and horizontal back to 2.

18. Add your watermark and copyrights if any. Re-size all layers so that height is no more than 450 width will adjust.

ANIMATION

1. Still using your image. Right click on Lines 1(merged layers) duplicate it 2 times. Close off the top and middle layer. You close or open a layer by clicking on the eye in the layers palette.

2. Click on Bottom Lines 1 layer. (original) Effects/Plugins/Xenoflex 2 lighting settings below do exactly as written. no other changes needed.
Leave this layer open.
3, Click on the middle layer of Lines (copy of lines 1) Apply the lighting again. Just click the Random Seed One time. Close this layer by clicking the eye in the layer palatte.

4. Click on the top layer of lines (copy 2 of lines 1) Again apply the lighting. Again click the random seed button one time.
Close off this layer.
5. Now Click on any layer besides your lines layer. Bottom Line layer should still be open. Copy merged. Now take it to your Animation Shop right click anywhere in the window and paste as new animation.

6. Back in your PsP program Close off the bottom (lines 1) layer. Open the middle lines layer (copy of lines 1). Copy merged Then take it to Animation shop again right click on the frame that is there select paste/after current frame.

7. . Close off the middle layer. Open the top (copy 2 lines 1) Layer. In PsP program Copy merged Then take it to Animation shop again right click the second frame, select paste/after current frame. I did not change the display time.


8. Save your animation.. I Always make a folder and name it to save my images in. (but do not close it.)


BACKGROUND.
1. Open new transparent image. 1280x300. With your dropper tool select a color from your image in your foreground color. Flood fill th
e image.2. Effects/Texture Effects/texture You can use your own or the one I supplied. But you must place it in your Programs texture folder.
1. Under Documents My Psp Files find the texture folder and drag it into it.
2. C/programs files/the name of your program and find the texture folder.
Settings
Size 50%, Smoothness 0,

Dept 1, Ambience 0,
Shininess 0 Angle 315, Intensity 50, Elevation 30. Color white

3. Making sure you have ruler set for viewing you do that under View. With you selection tool set on rectangle. Starting at the 150 ruler mark. Draw out a rectangle all the way to the left border and the entire length of the image.

4. Add a New Raster Layer with your dropper tool sele
ct a color from you image Flood fill the selection. Keep Selected.

5. Effects/Plugins/Xenoflex 2 Cracks. Settings below. Selections/Select none. Apply same drop shadow. Merge visible


6. Effects/Image Effects/Seamless tiling see settings below.

7. Select one of your Tubes copy and paste into your image Re-si
ze so that it fits on your cracked border. Apply same drop shadow.

8. Apply your Text settings below.


9. Apply your watermark if you wish too.
Save your Image in the folder you made, by going to File/Export/Jpeg Optimizer Value set at 30
PLEASE PLACE CREDIT ON ALL STATS
Tutorial by Babs C
HERE or HERE
Just copy and paste into your Stationary

I want to Thank Simply Classy n Sassy Group Testers for testing the
Tutorial
I hope you enjoyed this tutorial..

Monday, September 14, 2009

LOVE TRUST BELIEVE Tutorial 45


DATE WRITTEN: Sept, 15, 2009

THINGS NEEDED
PAINTSHOP PRO X2 OR SIMILAR PROGRAM.
You also need a good working knowledge of it, plugins and Animation Shop.
TUBE: Love Design Passion Tubes HERE site contains AC
PLUGIN: namesuppressed plaidlite, VM Natural Stardust
MY SUPPLIES: Download them HERE

Let's Begin

Once you set your drop shadow it will stay..
Always Close original image after you copy.
Always sharpen re-sized items one time.

1. Select BBD_LoveTrustBeleive_Brush from my supplies you downloaded. Go to File Export/custom brush please keep my file name when you name it. Open your tube.

2. Open a new transparent image 700X600 Pick a dark color from you tube in your foreground color and flood fill your image.

3. Add a new raster layer by right clicking in your layers palette. Chose another color from your tube in your foreground color and flood fill your layer. Re-size the layer 95%. Effects/3D/Drop shadow Vertical and Horizontal set to 2, Opacity set to 70 and blur set to 8.00.

4. Add a new raster layer to your by right clicking in your layers palette. Choose a light color from your tube in your foreground color a dark color in your Background color. Now Click on your foreground color to open the palette Under gradient find the foreground/background gradient. Change the angle to 45 and repeats to 6. Flood fill your image.

5. Effects/Plugins/Namesuppressed plaidlite see settings below. Apply same drop shadow. Go back and apply drop shadow again but this time change the vertical and horizontal to -2.

6. Copy your tube and paste into your image as a new layer. Re-size if needed I re-sized mine 70%. Apply same drop shadow. Make sure you change the Vertical and horizontal back to 2. arrange it so that your tube is touching the outside of your middle layer image.

7. Select your brush tool Find the BBD_LoveTrustBeleive_Brush and select it. Size set to 325. Select a color from you image in your foreground color. Add a new raster layer and apply your brush on the left top side of your image. You may have to click your mouse button a couple of times to get it dark enough. Apply same drop shadow.

8. Select the butterfly from my supplies copy and paste into your image as a new layer. Re-size it 40%. Duplicate it and mirror your duplicate. Place it on the bottom left corner. Duplicate the copy again place it by your text. Place the original up near the top of your flower on the right hand side. Drop shadow not needed as it has one.

9. Apply your watermark and copyright information. Right click on any layer in your layer palette and merge visible.

10. Re-size your image so that the height is no more than 410, width will adjust.

ANIMATION

1. Duplicate your Image one time. Click on the bottom Layer. Effects/Plugins VM Natural stardust use settings below.

2. . Close your bottom Layer Click on your duplicated copy (top layer) Apply the VM Natural stardust again but Change your Amount to 33 and and the random seed to 56. All other settings stay the same.

3, Close off your top Layer Open you bottom layer make sure you click on it. Copy and paste into Animation shop as new animation do this by right clicking anywhere in animation shop.

4. Close your bottom Layer Open your top layer make sure you click on it. Edit/copy and paste into animation shop after current frame. (do this by right clicking on the first frame.

6. Highlight frame 1 Go to Edit select all. Right click on frame 1 frame properties change the display time to 25.

6. Save your animation..

BACKGROUND

1. Find the sanami276_texture in my supplies Place it in your psp texture file. Older PsP versions C:/programs the name of you program then open it and find the texture folder. Corel places their PsP files in your documents folders.

2. Open a new image 1280x300 Select a light color from your tube in your foreground color flood fill your image.
Add Video
3. Effects/Texture Effects/Textures Select the texture I had you place in your texture folder. Use the settings below.

4. Select the sns_LtB_broderbkg from my supplies. I layered them so if you need to change the colors you could. If you do not need to merge the layers then copy and paste them into your image as new layer apply drop shadow. Vertical and Horizontal set to 1, Opacity set to 70 and blur set to 8.00

5. Effects/Image Effects/seamless tiling see settings below

Save your Image. By going to File/Export/Jpeg Optimizer value set at 30

PLEASE PLACE CREDIT ON ALL STATS
Tutorial by Babs C
HERE or HERE

Just copy and paste into your Stationary
I want to Thank Simply Classy n Sassy Group Testers for testing the Tutorial
I hope you enjoyed this tutorial..

Tuesday, September 8, 2009

Let's Talk about it. Tutorial 43


DATE WRITTEN: Sept 8, 2009

THINGS NEEDED
PAINTSHOP PRO X2 OR SIMILAR PROGRAM.
You also need a good working knowledge of it.
TUBE: I am using a Cris Ortega Tube I got from a group share.
MY SUPPLIES: HERENot all kits are same sizes. Re-sizing may be different

Let's Begin

Once you set your drop shadow it will stay..
Always Close original image after you copy.
Always sharpen re-sized items one time.

First find the texture in my supplies. You need to place it in your programs texture folder. If you do not know how to Then simply make a folder name it My textures. Open your PSP go to file, preferences. File locations Click on Textures. Then locate the folder and add it.

1. Open the mask from my supplies minimize it for now. Open your tube pick a light color for your foreground color and a dark color for your background color. Then minimize your tube for now.

2. Open a new 450x400 transparent image. Flood fill it with you light foreground color. Effects/textures. See settings below.

3. Add a new raster layer flood fill it with your dark background color.

4. Layers/new mask layer from Image. Select the mask BBD_mask 11 in the box. Make sure source Luminance is checked and invert mask data is checked click ok.

5. With your Right mouse button click on the white and black mask
in your layers palette it has a little mask icon on it. Select delete.
Right click top mask merge/merge group. When it ask “Would you like this
mask merged into the Layer below it” select yes. Apply Drop shadow Vertical and Horizontal set at 1, Opacity 70 and blur 10.00 Re-size mask layer 85 %.

6, Select your Tube copy and paste into image as new layer. Re-size if needed. Apply your same drop shadow place your tube inside the mask. Merge tube layer down into your mask layer. Pull your merged layer down towards the bottom some.

7. Select the flowers from my supplies copy and paste them into your image as new layer. Re-size them 25%. Move them to the bottom left of your mask. Apply same drop shadow.

8. Select the Butterfly from supplies copy and paste it as new layer into yoru image. Go to Image/Free rotate it 20.00 left make sure rotate all layers is not checked an rotate single layer around canvas is not checked. Apply same drop shadow and paste on right bottom corner. No re-size needed.

9. Select the Beads from my supplies copy and paste them as new layer into your image. Place them at the top of your mask. Apply same drop shadow. No re-size needed.

10. Select the frame from my supplies, Copy and paste it into your image as new layer. Click on it with your magic wand settings below. Select the dark background color you used for your mask and flood fill the selection. Selections/select none.

11. Select the font of your choice see settings below. Type out your saying. Place it at the top of you image. Apply same drop shadow. Note if you use a fat font you need to set your stroke at 0. I used a thin font. Once you are happy with size and placement convert to raster layer.

12. Apply your watermarks and credit merge visible and save your image.


BACKGROUND.

1. Open new transparent image. 1280x300. Flood fill it with you light foreground color. Effects/textures. Same settings as you used for your header.

2, Select the Border from my supplies copy and paste it into you image.
Do the following under your selections tab.. A. select all, B. select float.
C. Select defloat. Now flood fill with you’re the same dark color you used for you mask. Selections Select none. Apply same drop shadow. Move it to the left border. Merge visible.

3. Note that is better not to use seamless tiling for this background.

4. Select the pink flower from my supplies. Copy and paste into your image as new layer. Re-size it 30%. Apply same drop shadow. Move it over onto the border duplicate one time. But one up top to the left and one at the bottom to the right. See my image.

5. Open the butterfly copy and paste into your image as new layer. Apply drop shadow and move it so that it is between the flowers on the border. No need to re-size. Merge visible.

Save your Image. By going to file/jpeg optimizer value set at 30.

PLEASE PLACE CREDIT ON ALL STATS
Tutorial by Babs C
HERE or HERE

Just copy and paste into your Stationary
I want to Thank Simply Classy n Sassy Group Testers for testing the Tutorial
I hope you enjoyed this tutorial..