DATE WRITTEN: Sept 8, 2009
THINGS NEEDED
PAINTSHOP PRO X2 OR SIMILAR PROGRAM.
You also need a good working knowledge of it.
TUBE: I am using a Cris Ortega Tube I got from a group share.
MY SUPPLIES: HERENot all kits are same sizes. Re-sizing may be different
Let's Begin
Once you set your drop shadow it will stay..
Always Close original image after you copy.
Always sharpen re-sized items one time.
First find the texture in my supplies. You need to place it in your programs texture folder. If you do not know how to Then simply make a folder name it My textures. Open your PSP go to file, preferences. File locations Click on Textures. Then locate the folder and add it.
1. Open the mask from my supplies minimize it for now. Open your tube pick a light color for your foreground color and a dark color for your background color. Then minimize your tube for now.
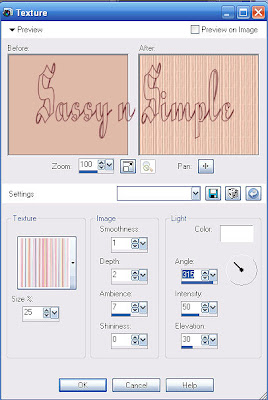
2. Open a new 450x400 transparent image. Flood fill it with you light foreground color. Effects/textures. See settings below.

3. Add a new raster layer flood fill it with your dark background color.
4. Layers/new mask layer from Image. Select the mask BBD_mask 11 in the box. Make sure source Luminance is checked and invert mask data is checked click ok.
5. With your Right mouse button click on the white and black mask
in your layers palette it has a little mask icon on it. Select delete.
Right click top mask merge/merge group. When it ask “Would you like this
mask merged into the Layer below it” select yes. Apply Drop shadow Vertical and Horizontal set at 1, Opacity 70 and blur 10.00 Re-size mask layer 85 %.
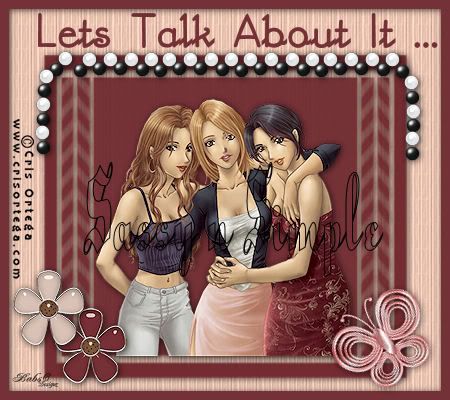
6, Select your Tube copy and paste into image as new layer. Re-size if needed. Apply your same drop shadow place your tube inside the mask. Merge tube layer down into your mask layer. Pull your merged layer down towards the bottom some.
7. Select the flowers from my supplies copy and paste them into your image as new layer. Re-size them 25%. Move them to the bottom left of your mask. Apply same drop shadow.
8. Select the Butterfly from supplies copy and paste it as new layer into yoru image. Go to Image/Free rotate it 20.00 left make sure rotate all layers is not checked an rotate single layer around canvas is not checked. Apply same drop shadow and paste on right bottom corner. No re-size needed.
9. Select the Beads from my supplies copy and paste them as new layer into your image. Place them at the top of your mask. Apply same drop shadow. No re-size needed.
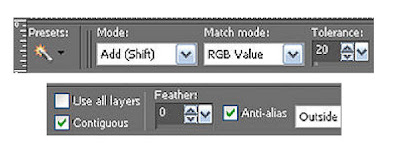
10. Select the frame from my supplies, Copy and paste it into your image as new layer. Click on it with your magic wand settings below. Select the dark background color you used for your mask and flood fill the selection. Selections/select none.

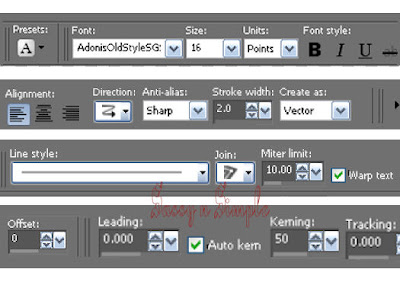
11. Select the font of your choice see settings below. Type out your saying. Place it at the top of you image. Apply same drop shadow. Note if you use a fat font you need to set your stroke at 0. I used a thin font. Once you are happy with size and placement convert to raster layer.

12. Apply your watermarks and credit merge visible and save your image.
BACKGROUND.
1. Open new transparent image. 1280x300. Flood fill it with you light foreground color. Effects/textures. Same settings as you used for your header.
2, Select the Border from my supplies copy and paste it into you image.
Do the following under your selections tab.. A. select all, B. select float.
C. Select defloat. Now flood fill with you’re the same dark color you used for you mask. Selections Select none. Apply same drop shadow. Move it to the left border. Merge visible.
3. Note that is better not to use seamless tiling for this background.
4. Select the pink flower from my supplies. Copy and paste into your image as new layer. Re-size it 30%. Apply same drop shadow. Move it over onto the border duplicate one time. But one up top to the left and one at the bottom to the right. See my image.
5. Open the butterfly copy and paste into your image as new layer. Apply drop shadow and move it so that it is between the flowers on the border. No need to re-size. Merge visible.
Save your Image. By going to file/jpeg optimizer value set at 30.
