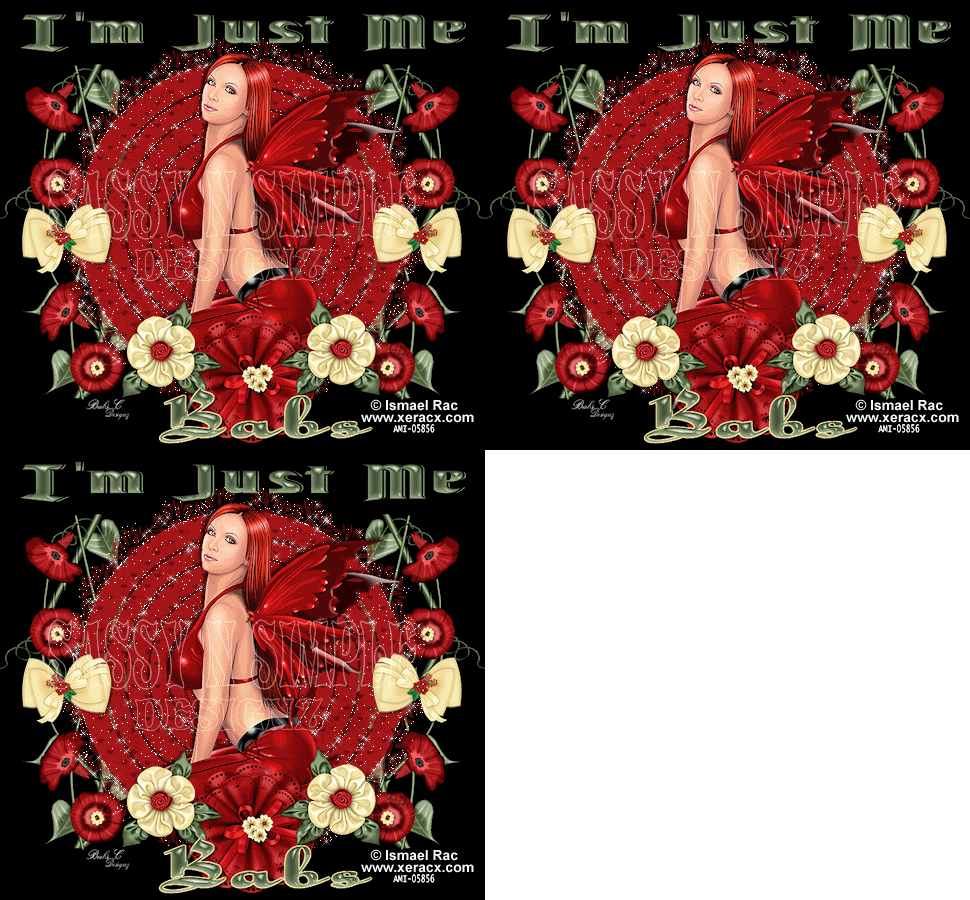
DATE WRITTEN: Oct 6, 2009
THINGS NEEDED PAINTSHOP PRO X2 OR SIMILAR PROGRAM. My tutorials can be adapted to other versions some settings may vary slightly. You must have a good working knowledge of the programs I use.
TUBE: Ismael Rac must purchase this tube at AMI
KIT: Bea Creations Tagger Kit FTU Angela HERE
MASK: BBD_Mask11 HERE
PLUGINS: Lokas Artistic Effects (Gel) and Xenoflex 2 Constellations
If you choose a different kit re-sizing may change.
Let's Begin These Steps must be done,
I will not repeat in it step.
We will use same drop shadow unless I state otherwise.
Always Close original image after you copy unless stated otherwise.
Re-size settings Smart size. All other settings are default.
Always sharpen re-sized items one time.
Open your tube Keep Tube Opened and the mask BBD_MASK in my supplies minimize the mask. The Kit referred to is BC_Angela
1. Open a new transparent image 700X650 With your dropper tool select a dark color from your tube in your foreground color. I used black. Flood fill the image.
2. Select the sns_scallopcircle that you downloaded in my supplies.
Edit/copy, Edit/paste as new layer into your image. Selections/select
all, Selections/float, Selections/defloat. Select Paper 5 from the
Kit Edit/copy, Edit/paste into selection. Selections/select none
3.Add a new raster Layer above your scallop circle layer.
With your drop tool select a color from your tube, Just click your
left mouse button for your foreground color. Now flood fill your selection. Re-size it 90%.
Selections Select none. Delete the black scallop circle.
4. Select Flower 18 from the Kit, Edit/copy, Edit/paste as new layer into your image. Below your mask Layer. Click on the mask layers Eye in your palette to close mask so that you can pull the flower over to the right side of you mask. Refer to my image if you need to. Apply Drop Shadow below
Vertical 2
Horizontal 2
Opacity 70
Blur 5.00
Color Black Shadow on new layer unchecked
5. Still on your Flower. Right Click on the Layer in your Layers Palette. Duplicate it 1 time. On tool bar go to image/mirror. Open your mask and make sure it looks correct. Then close mask back and Merge visible. You can now open your mask back up.
6. Select your Tube Edit/copy, Edit/paste as new layer into your image. Re-size if needed. Apply same drop shadow center in it your mask layer.
7. Select Flower 10 from the kit, Edit/copy, Edit/paste as new layer into your image. Re-size 70 %. Place in the center on the Bottom of you Image. (refer to my image. Apply same drop shadow.
8. Select Flower 23 from the Kit. Edit/copy, Edit/paste as new layer into your image. Re-size 50%. Apply Drop Shadow. Move it to the right side of your Bottom Center flower.
9. Still on the same Flower Layer In the Layers Palette right click, Duplicate Layer Once. Go To your Tool bar Image/mirror.
10. Select Bow 13 from the Kit Edit/copy, Edit/paste as new layer into your image. Re-size the bow 70%. Place it in the Left Center of your image.(refer to my image)
11. Still one the Bow Layer In the Layers Palette right click, Duplicate Layer Once. Go To your Tool bar Image/mirror.
12. Select your dropper tool Select a Color that will stand out. I used the green from the leaves. Left Mouse button for your foreground Color and Right Mouse Button for your Background Color.
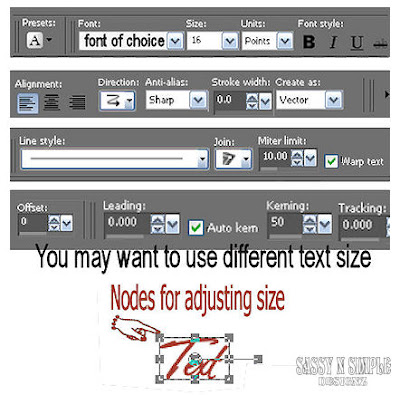
13. Select your text tool settings below. Select a font of your choice Type Out Your Text. Size your Text with your Nodes. Place Text at the top of your image. Right Click on the Layer in your Layers palette convert to raster layer. Font I used was La Mesa.
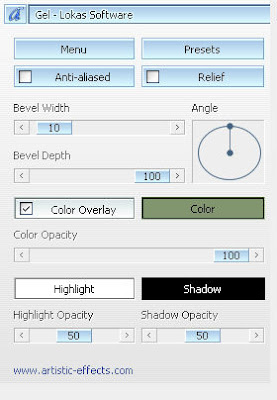
 14. Effects/Plugins/ Lokas Artistic Effects Gel Settings Below. Make Sure to change the color to match your Text Color. Apply Drop shadow.
 15. Apply your copy rights and water mark. Close off the Background and Mask layer. Right Click on any layer Merge/merge Visible. Re-size image so that height is 450 width will adjust. Open all layers back up.
Animation
First Open your Animation Shop. Minimize it
1. Right Click on your Mask Layer Duplicate it 2 times. You now have 3 mask Layers Group Raster, Copy of Group, Copy (2) of Group.First Open your Animation Shop. Minimize it
2. Click on the Top Mask Layer in Layers Palette. (Copy (2) Group. On Tool Bar Effects/Plugins/Xenoflex 2 Constellations Apply Settings Below. Now Click on Eye to close this Layer by clicking the eye.
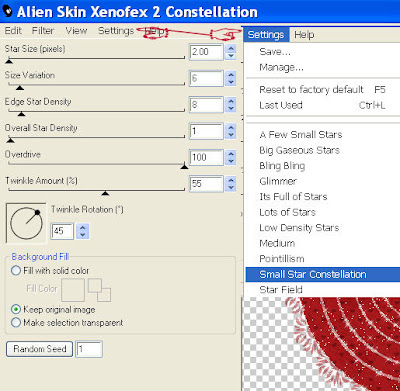 3. Click on the Middle Mask Layer (copy of group) Apply the Constellations again. But this time click the random seed Button one time. Close this Layer by clicking the eye.
4. Click on the Bottom Mask Layer (Group) Apply the Constellations again. But this time click the random seed Button one time.
5. Now Edit/copy merged. Open your minimized Animation Shop. Right click in where in working space. Paste as new animation.
6. Close off your Bottom Mask Layer Open the Middle Mask Layer (Copy of Group) Now Edit/copy merged. Take it to Animation Shop Right click first frame Paste/paste after current frame.
7. Close off your middle Mask Layer Open Top Mask Layer copy (2) Edit/copy merged. Take it to animation shop Right Click Second Frame Paste/paste after current frame.
8. I did not change Display time. Save your animation In a folder where you can find it.
BACKGROUND
 1. Open new transparent image. 1280x300. Select Black in your foreground color and flood fill your image. 2. Effects/Image Effects/Seamless tiling settings below.
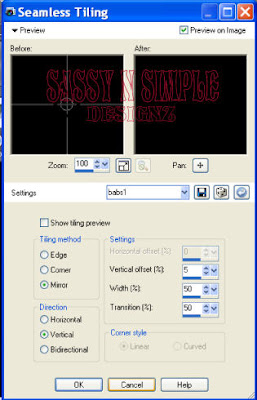 3, Select Flower 10 From the Kit Edit/copy, Edit/paste as new layer into your image. Do not re-size move it to he left border of your image slightly outside the image. Refer to my image.
4. Select Flower 25 Edit/paste as new layer into your image. Re-size 30%. Apply Drop shadow. Move to Left Border Duplicate the flower 2 times. Arrange around Flower 10 refer to my image
5 Merge Visible. Save your Image in the folder you made, by going to File/Export/Jpeg Optimizer Value set at 30
